We will next look at two offline tools that actually are useful for inserting and editing images, templates and tables of contents.
There are several ways to set up and use the offline or traditional version of MS Word. Most of them involve setting up a Microsoft account. One way you can use MS Word for free without an account is to go to your local library and use one of the library computers. Most schools also have MS Word installed on their computers. You can also access MS Word for free if you have a school related email address (one ending in dot edu). You can also simply pay for MS Word on a monthly or annual basis. A final option is to get the 30 day free trial version of MS Word. You can only get this free trial once. Also to get the free trial, you need to give Microsoft your credit card number and you also need to remember to cancel within 30 days to avoid MS charging your credit card.
The point in downloading the 30 day free trial of the current paid version of MS Word is to see how it differs from the free online version of MS Word and to capture screen shots of the current version of MS Word.
The second issue is installing MS Word on your personal computer. This is an easy matter if you have a Windows computer. However, I personally use a Linux computer because I run dozens of websites and I cannot afford to have my computer infected by Windows Ransomware or other Windows malware that would destroy all of my files. Sadly, MS Word does not come in a version for Linux. And it would not matter if MS Word did come in a version for Linux because hackers can also install ransomware directly from MS Word documents.
The only secure solution to using MS Word on a Linux computer is to create a Windows 10 virtual machine (which can be done for free in a matter of minutes) and then install the 30 day trial version of MS Word in the virtual machine. This virtual machine acts almost exactly as if it were MS Word running in a Windows 10 computer (including being able to go online, install and use a web browser). But if a hacker were able to attack this Windows 10 installation or if I downloaded an infected MS Word document, all the hacker would be able to do is destroy my virtual machine. They would not be able to attack any of the programs and documents on my Linux File Manager.
In other courses and books, such as Learn Linux and LibreOffice, I explain how to set up a free virtual machine. The key issue is that while Linux works fine with just 2 GB of RAM and 20 GB of storage, Windows 10 requires a minimum of 4 GB of RAM and 50 GB of storage in the virtual machine. You therefore need at least 8 GB of RAM on your personal computer in order to set up a Windows 10 virtual machine and still have any RAM left for your normal activities.
Whether you are using a real Windows computer or a virtual machine inside of a Linux computer, here is what MS Word looks like when you open it:
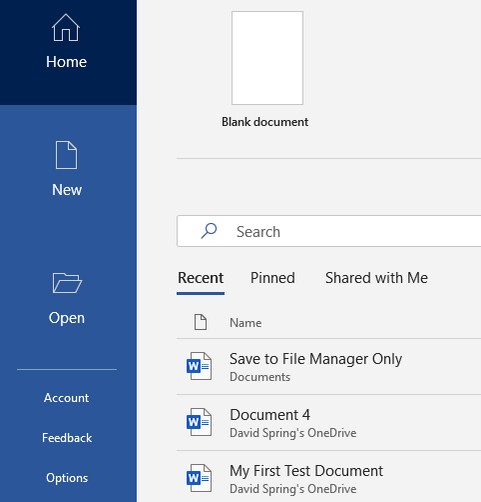
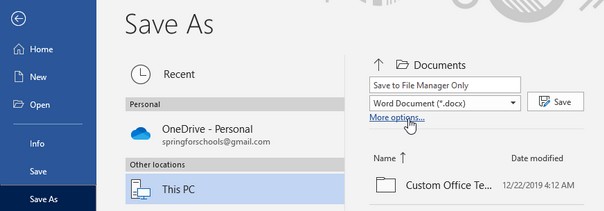
Click on Blank Document to open a new blank document - or click on New to get more template choices. To save an existing document as a new custom template, open the document. Then click File, Save As and choose More Options.
This will open up your File Manager.
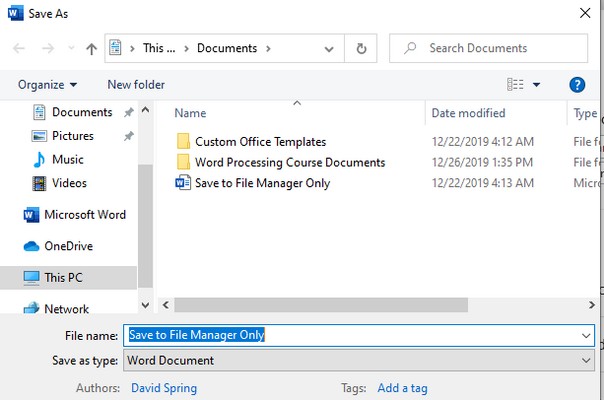
Click on Custom Office Templates to put the template in your templates folder.
Then click on the dropdown for Save as Type and select Word Template.

Change the File Name to your custom template. Then click Save. You can now find your custom template under New, Personal,
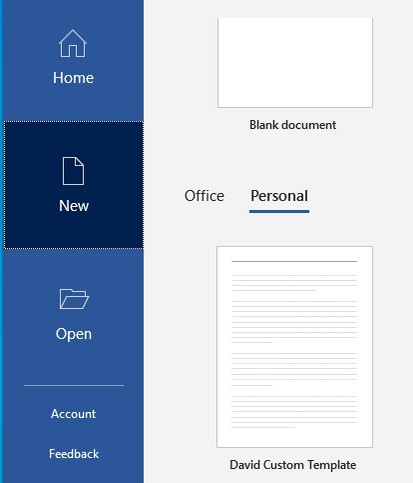
You can right click on this template and create a new document based on this template. However, you can not make your custom template the default template. To change the default template, you need to click File, Open.
Then go to C:\Users\user name\AppData\Roaming\Microsoft\Templates. Then open the normal template (Normal.dotm). Make any changes that you want, then click File, Save.
A Tour of the MS Word Main Menu
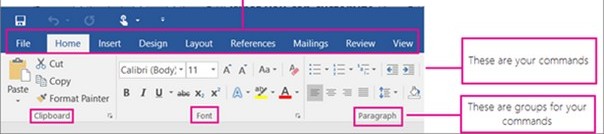
Here is the MS Word Main Menu. Similar to the MS Word Online Menu, MS Word Offline opens in the Home tab which is really the Formatting tab.

The above menu can look pretty confusing to folks who only use MS Word occasionally. This opening screen has 10 top level menu items and 5 categories of toolbar icons (Clipboard, Font, Paragraph, Styles, Editing and Voice). There are 37 icons in these 5 categories and you simply have to learn and remember what each of these 37 icons does.
Each of these 5 toolbar categories also has many more hidden functions that you access by clicking on small arrows. There are a total of 14 small arrows leading to more than 50 additional hidden functions.
To make matters even harder on beginners, the toolbar area keeps changing based on a variety of factors such as whether you have clicked on a different top level menu item and whether you have selected a section of text, an image, a table etc.
To keep you on your toes, MS Word uses different terms than other word processors. For example, it calls its top menu items TABS and calls the toolbars underneath the tabs, RIBBONS.
The ribbons are also called Floating Ribbons because they keep changing. The toolbar icons are called Commands and the categories of toolbars are called Groups of Commands.
As an example of how much the floating ribbon changes, here are the Insert Menu options:
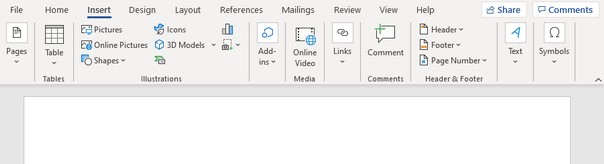
The Insert tab has 9 Groups of Commands most of which thankfully have words next to the icons to give you a clue as to what the command does. However, as with the Home tab, there are many hidden commands that you reach by clicking on tiny dropdown arrows. For example, the Pages drop down arrow has Cover Page, Blank Page and Page Break. The Tables drop down arrow will insert several different kinds of tables.
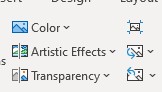
Pictures allows you to add an image from your file manager. Right click on the selected image to bring up some formatting options. Because of the importance of image compression, we will cover the steps needed to compress an image with MS Word.
How to Compress an Image with MS Word
Step 1: Double left click the image to bring up the Picture Formatting Toolbar
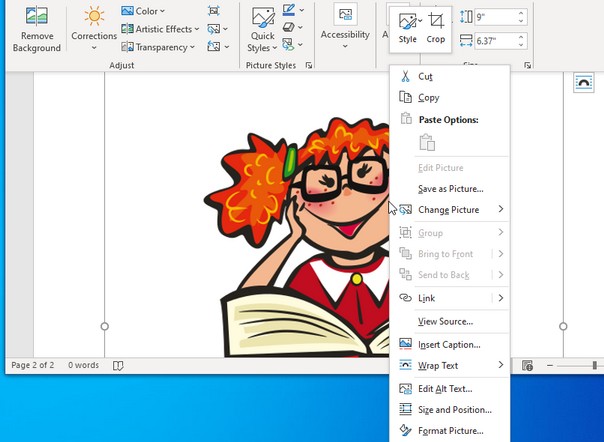
To compress a selected image, double left click on it to bring up the Picture Format tool bar.
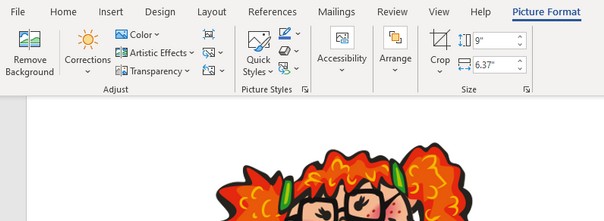
Step 2: Find and click on the Unlabeled Compress Image Icon.
To the right of the Color icon is an unlabeled icon. Click on the icon.
Step 3: Find and Choose the Web Resolution
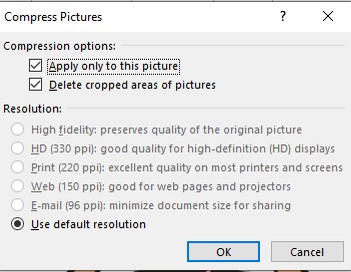
Choose the Web resolution.
Step 4: Click OK.
Here are the Design ribbon options which have 9 more drop down arrows to click on.

Here are the Layout Ribbon options with 11 more drop down arrows.

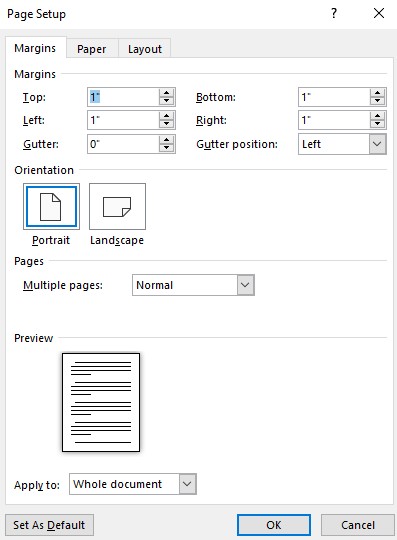
Some of these arrows are pretty important. For example, in the right lower corner of Page Setup group of commands is an arrow that leads to a screen with all of the Page Layout options:
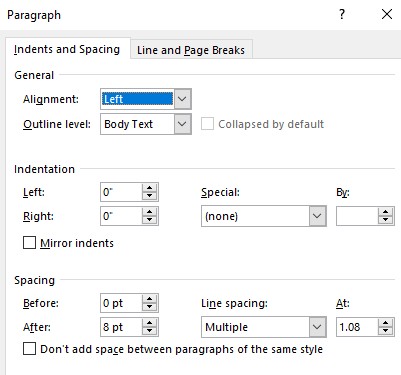
To the right of the Paragraph Group of Commands is an arrow leading to all of the Paragraph Formatting options:
Here are the References Ribbon options.

Here are the Mailing Ribbon options.

Here are the Review Ribbon options.

Here are the View Ribbon options:

The challenge with using MS Word is trying to remember which tabs have which commands as well as what is hidden behind the dozens of drop down arrows.
The other challenge is keeping the Word window narrow enough to permit side by side editing. What is needed is some simple options for displaying ribbons with fewer options.
Sadly, it can be pretty difficult to simplify the appearance of the ribbons of MS Word. To customize your ribbons, you need to open the Customize the Ribbon window. This function is also somewhat hidden from view. First, click on File, then scroll down to Options. Then click on Customize the Ribbon. This will bring up the following screen:
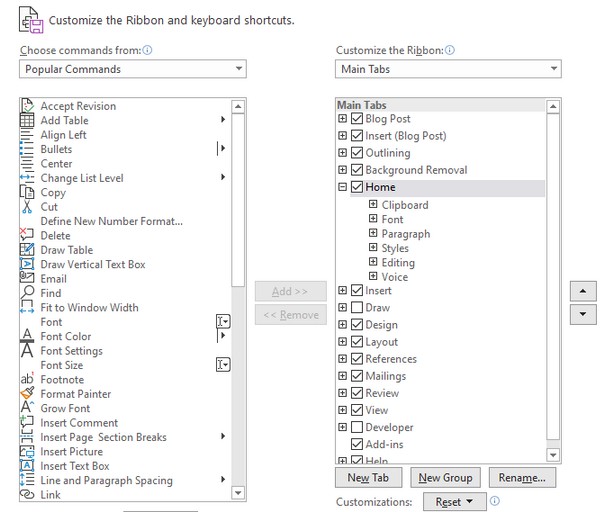
Our goal is to simplify the existing toolbars by removing un-needed commands. In the Home tab, click on the Font group. Scroll down to the Strikethrough command and select it. Sadly, there is no way to remove this command. In fact, you can only remove individual commands from a custom group that you created or you can remove an entire group of commands from a tab. This is not what we want so click the Cancel button at the bottom of the page.
In later lessons, we will go over how to use many of the functions of MS Word. But next, let’s look at LibreOffice Writer.