In this section, we review how, when and why to add 8 custom page styles to a book template. These custom book page styles include:
#1 - a Cover page style to insert a front cover to a report or book
#2 – a Front Matter Page Style for pages at the front of the book such as the title and copyright pages that do not use page numbers.
#3 – a Table of Contents Page Style to place a border and other styling on our Table of Contents pages.
#4 – A Preface page style that uses lower case Roman numeral page numbers.
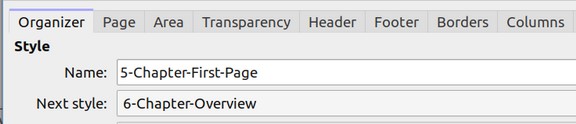
#5 – a Chapter First Page Style that uses a background image and foreground text and does not have a header or a footer.
#6 – a Chapter Overview Page Style that introduces the topics in a chapter and has a footer but not a header.
#7 – a Chapter Content Page Style that has both a header and a footer with Arabian page numbers.
#8 – a Back Matter Page Style that may or may not have a header and/or a footer depending on the content.
You may not need more than three of these page styles with your book. But we are including all 8 of them here as examples of various ways that custom page styles can be used to create interesting page layouts.
We will also indicate with each page style which page style will come after the current page style when we enter a normal page break. Here is a table outlining the sequence of page styles:
|
Page Style # |
Current Page Style |
Next Page Style |
|
1 |
Cover |
Default |
|
2 |
Front Matter |
Front Matter |
|
3 |
Table of Contents |
Table of Contents |
|
4 |
Preface |
Preface |
|
5 |
Chapter First Page |
Chapter Overview |
|
6 |
Chapter Overview |
Chapter Content |
|
7 |
Chapter Content |
Chapter Content |
|
8 |
Back Matter |
Default |
The reason that the first custom book page style, Book Cover, is followed by the Default Page style is that we will be inserting an extra page break after the cover and we do not want that extra page to use the cover background image. The reason we have Front Matter and Chapter Content followed by the same page style is that we will be inserting several page breaks with each page style. We want each section to retain the previous page style. To change page styles, we will use manual page breaks.
Two types of Page Breaks
Go to Insert, Page Breaks and you will see a normal page break and something called More Breaks:
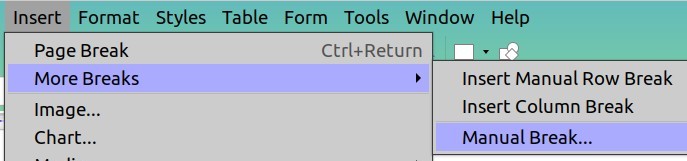
More Breaks has three options, the last of which is called Manual Break. If you click on the normal page break, Writer will just insert a page break without any chance to change the page style or change the page number. But if you click More Breaks > Manual Break, the following screen will appear allowing you to manually change the page style and even the page number if needed.
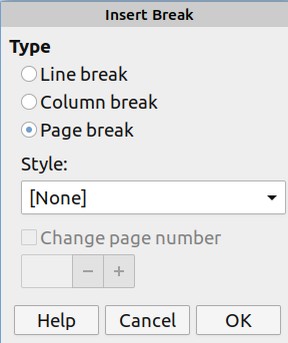
Click the drop down arrow to the right of the word none to bring up a list of all of the default page styles plus all of the custom page styles you have created.
Note: While Page styles change when you enter a page break, paragraph styles change to the next paragraph style when you press ENTER on your keyboard.
Tip: To apply a style to a page or paragraph, select the page or paragraph. Then click on the style you want to apply.
Page style changes at the beginning of your book
(yellow arrows are normal page breaks, red arrows are manual page breaks):
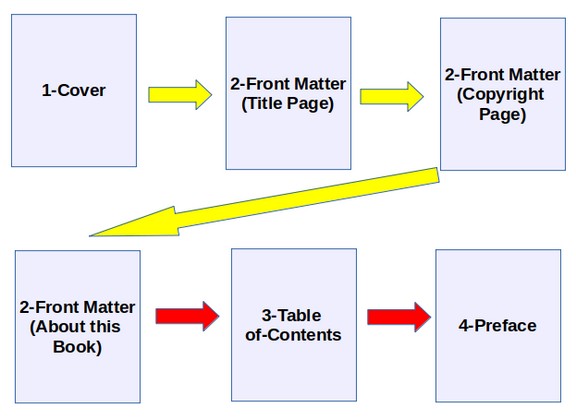
Do a Manual Page Break at the end of the Front Matter sections in order to change the pagee style to Table of Contents. Then do a manual page break at the end of the Table of Contents pages in order to change the page style to Preface. Then do another manual break at the end of your Preface in order to change the page style to Chapter First Page.
Page style changes at the beginning of each chapter
(yellow arrows are normal page breaks):
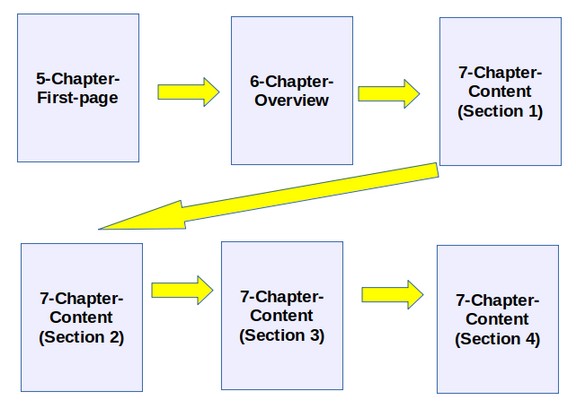
Then do a Manual Page Break at the end of section 4 in order to change the page style back to the Chapter First Page Style.
When to Change Page Styles
There are only a few reasons to change page styles. The first reason is if we want to change either the top and bottom and or left and right page margins. The second reason is if we want to add a header and or footer to a page. The third reason to change page styles is if we want to change the appearance of the page in some other manner such as adding a background image or background color to a page. A fourth reason is if we want to add a border around a page.
Here is a table showing the changes from one page style to the next:
|
# |
Page Style |
Margins |
Page #s |
Header |
Footer |
Border |
|
1 |
Cover * |
0-0-0-0 |
None |
No |
No |
No |
|
2 |
Front Matter |
Default |
None |
No |
No |
No |
|
3 |
Table of Contents |
Default |
None |
No |
No |
Yes |
|
4 |
Preface |
Default |
I, ii, iii |
No |
Yes |
No |
|
5 |
Chapter First Page * |
Default |
1, 2, 3 |
No |
No |
Yes |
|
6 |
Chapter Overview |
Default |
1, 2, 3 |
No |
Yes |
No |
|
7 |
Chapter Content |
Default |
1, 2, 3 |
Yes |
Yes |
No |
|
8 |
Back Matter |
Default |
1, 2, 3 |
Maybe |
Maybe |
No |
* The Cover and Chapter First Page Styles also have custom background images.
Looking at the default Writer Page Styles.
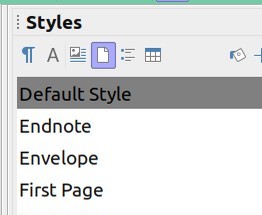
To see the built in Writer Page Styles, click on Styles > Manage Styles to bring up the Styles Window. Then click on the fourth icon which is the Page Styles:
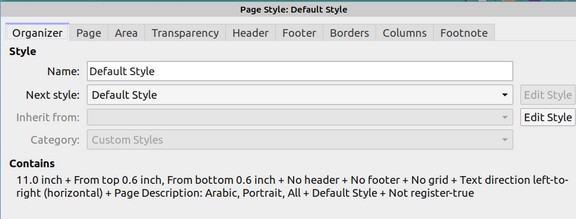
The default page style with Libre Writer is called Default Style. Right click on Default Style and click Modify
Then click on the Page tab
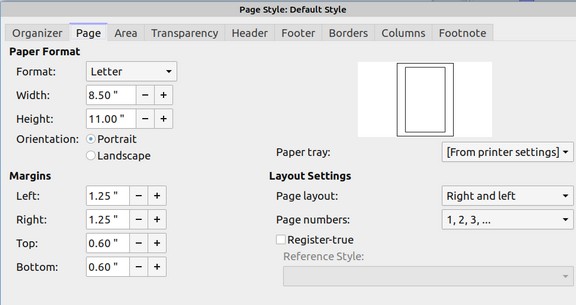
We have modified the default page style in our default template in a previous chapter so that the Left and Right margins are 1.25 inches resulting in a more readable paragraph width of 6 inches. The default Page style does not have a header or a footer.
Click Cancel to close the default page style. Then left click to select the First Page Style. Then right click and click Modify.
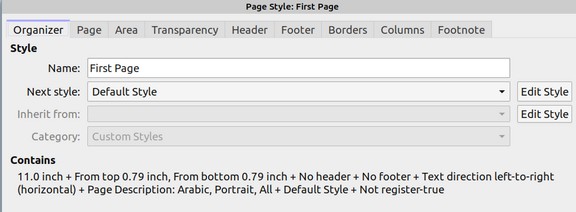
The First Page style is set to switch back to the Default page style after inserting a page break. Click on the Page tab.
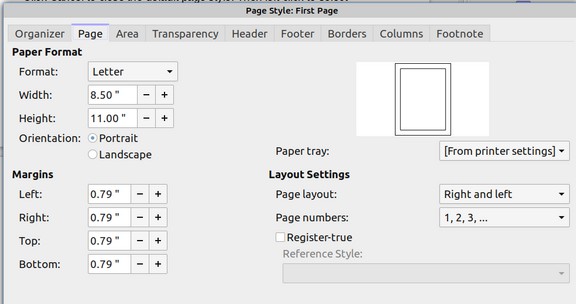
The First Page style is set for Margins to be 0.79 inches all the way around. If we want different margins for the First Page style, then we would need to change them in our custom book template document. If we want to add custom Page Styles, we need to first create a book document and then add the page styles to the book document.
Create a Blank Book Template Document
Open Libre Writer and click File > New > Text Document. Type My Custom Book Template. Then save the document as My Custom Book Template in a new folder called My Custom Book Template.
Create our 8 Custom Page Styles in Reverse Order
As we have seen above, each page style needs to specify a page style that comes after it. Many custom page styles need to be based on an existing page style. We will therefore begin by creating our last page style, which is Back Matter.
Step 1: Create the Back Matter Page Style
We will base the Back Matter page style on the Default Page Style and specify the following page style as the Default Page style. To create a new page style based on the default page style, click on Styles > Manage Styles in the main menu. Then click on the Page Styles icon. Then right click on the Default Style and click New.
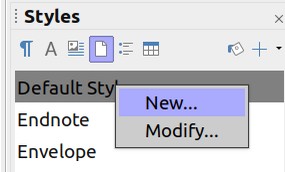
Clicking New brings up this screen:
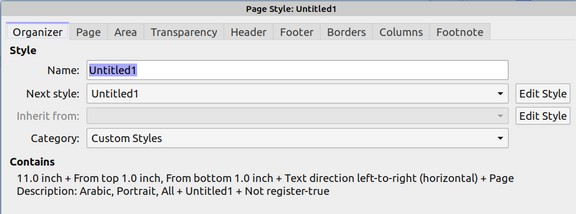
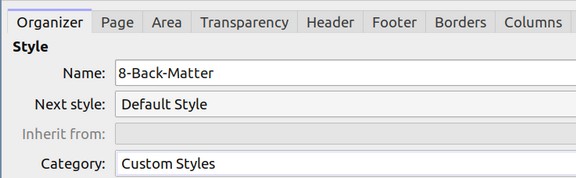
Change the Style Name from Untitled to 8-Back-Matter and change the Next Style to Default Style.
Then click the Page tab.
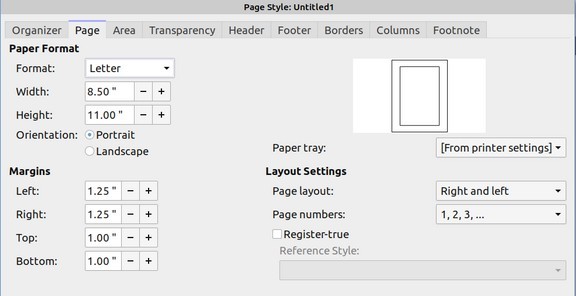
As we explained in a previous chapter, we want the top and bottom margins to be one inch so that we will have the same content on every page of our 8 ½ by 11 PDF book as we have on our 8 by 10 print book. All we need to do to convert from the PDF page style to the Print Book page style is change the top and bottom margins to 0.5 inches. Then both documents will have a content height of 9 inches. Changing the Page Right and Left Margins from 1.25 inches to 1.00 inches on the 8 by 10 print book will result in both documents having a content width of 6 inches.
If the Back Matter section contains additional information about the current book, then you may want to include both a header and a footer. However, in our template, we will assume that the back matter section is only information about other related books and courses. We will therefore not use a header or a footer on the back matter pages.
Since the default style also does not have a header or footer, the only difference between the default page style and the back matter page style is the name! So why even bother having a back matter page style??? Because you may have some books in which the back matter page style is different from the default page style.
Tip: If you want your custom paragraph or page styles to appear at the top of the list of styles in the Styles Panel, place a number such as 1, 2 or 3 in front of the name of the style.
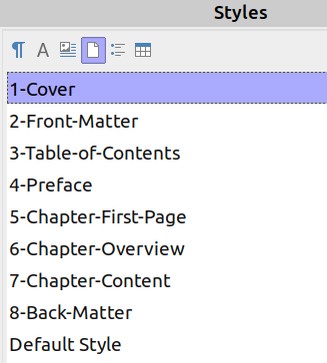
Here is what our Styles Panel Page Styles column will look like after adding our 8 custom page styles:
Step 2: Create the Chapter Content Page Style
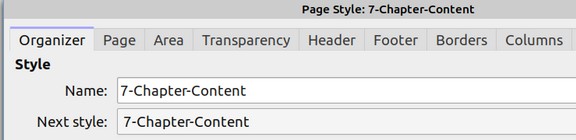
The Chapter Contents page style is also based on the Default Page style. So right click on the Default Page style and click New. Then change the Style Name to 7-Chapter-Content and change the Next Style (at least initially) to Default. Our Chapter Content Page Style will have both a header and a footer while our Chapter Overview Page style will only have a footer. So next click on the Header tab.
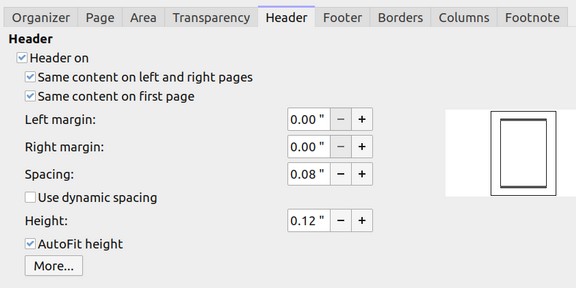
To turn on the Header, check the Header On box. Then change the spacing from 0.20 inches to 0.08 inches and change the height of the header from 0.20 inches to 0.12 inches. Then click the More box:
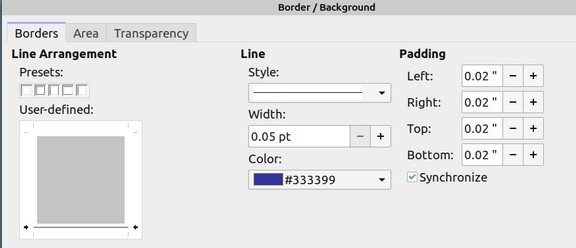
We want a single line border below the header. So click in the bottom of the User Defined box to add this single line border. Then change the color of the border from black to dark blue (#333399). Then click on the Area tab.
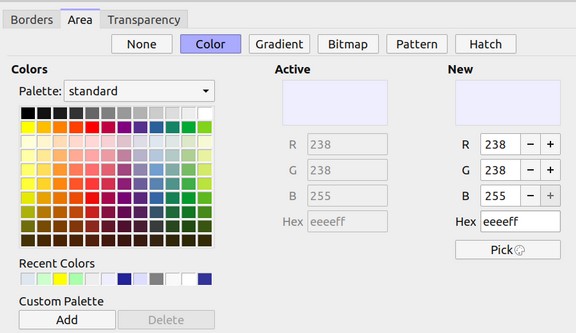
To choose a custom color, click on the Pick box.
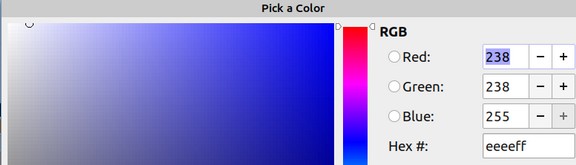
Enter a 6 digit Hex value in the box. We have entered eeeeff which is a very light blue. You can also just use your cursor to click on the box on the left to choose a color. Then click OK. You can also click on Gradients if you want to use a Gradient Background or you can click on Bitmap if you want to use an image background. Then click OK again. Next click on the Footer tab.
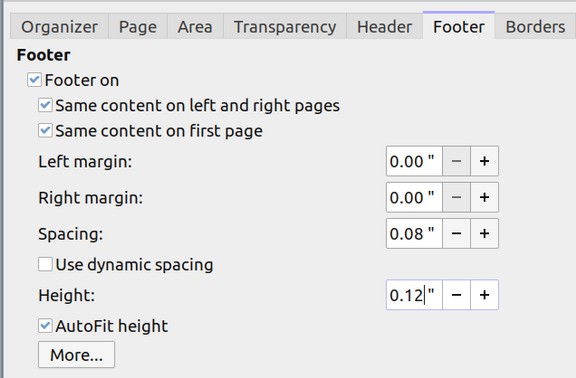
Check the Footer on box. Then change the spacing to 0.08 and the height to 0.12 inches. Then click the MORE box to open this screen:
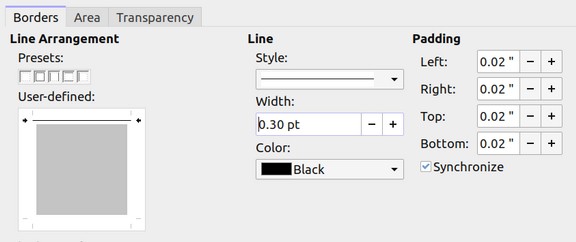
In the User-defined box, click the top border only. Then increase the width to 0.30pt. Then click OK and OK. You should now have two new page styles in your Styles panel. After creating and saving 7-Chapter-Content page style, right click on it and click Modify. Then change the Next Style to 7-Chapter-Content. Then click OK.
Doing this will retain this page style when entering a page break.
Step 3: Create your Chapter Overview Page Style
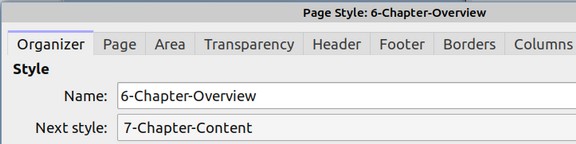
The Chapter Overview Page Style will be based on the Default Page Style. So again right click on the Default Page Style and click New. Then name the new style 6-Chapter-Overview. Then make the Next Style 7-Chapter-Content.
Click on the Page tab and make sure that the margins are 1.25 for the sides and 1.5 inches for the top and 1.0 inches for the bottom.
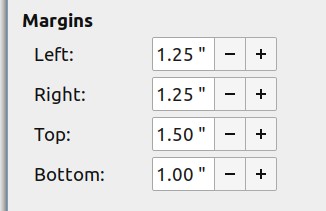
The purpose of giving the Chapter Overview page a bigger margin at the top is to help readers tell the difference between the Overview page and all of the other pages of the chapter. This is also why we will not use a header on the Chapter Overview page. Then click the Footer tab and match the settings of the Chapter Content Footer.
Step 4: Create Your Chapter First Page Style
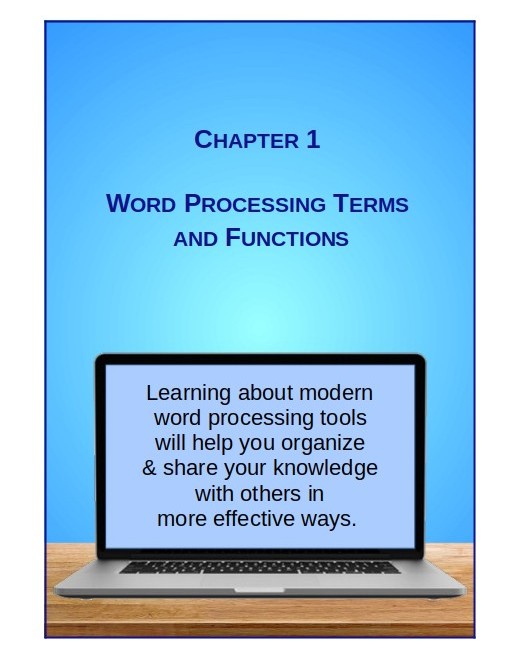
Chapters are the primary division points for most books. The transitions from one chapter to the next is important because the new chapter is introducing a new subject. You want to prepare your readers for this new subject – which is the reason we are also including a chapter overview page. But you also want to use the chapter first page as an opportunity to help the reader understand why they would benefit from learning the new subject. One way to distinguish your chapter first pages from all other pages is by using a border around your chapter first page. Another way is to use a background color or a background image on your chapter first pages. If you use a background image, it should be an image that has a space for the chapter title and a chapter quotation to be placed in the foreground. In our example custom book template, we will first create a chapter background image, a copy of which is shown below:

We will place the chapter number and title in the upper half of this image and place a place a chapter introductory quote in a text box inside of the computer screen such that each chapter will have its own introductory quotation.
We will also place a thick border around the background image with a substantial margin outside of the border. Finally, we will not use a header or a footer on our chapter first pages. Here is the end result for our first chapter:
To create this custom chapter first page style, right click on the default style and click New. Name the style 5-Chapter-First Page and select the 6-Chapter-Overview page style as the next style:
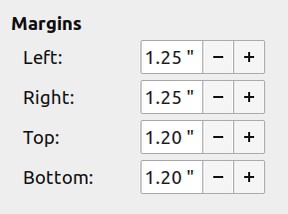
Click on the Page tab and set the margins for 1.25 inches on the sides and 1.2 inches on the top and bottom:
Then click on the Border tab and choose the border option for all four sides:
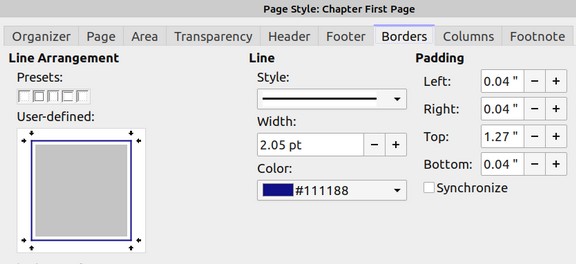
Increase the thickness of the board to 2 points and change the color to dark blue. Then uncheck Synchronize and change the top padding to 1.27 inches. This is important in order to push our Heading 2 title down a little from the top of the page.
Then click the Area tab and click the Bitmap tab. Click the Add/Import button to load your chapter first page background image:
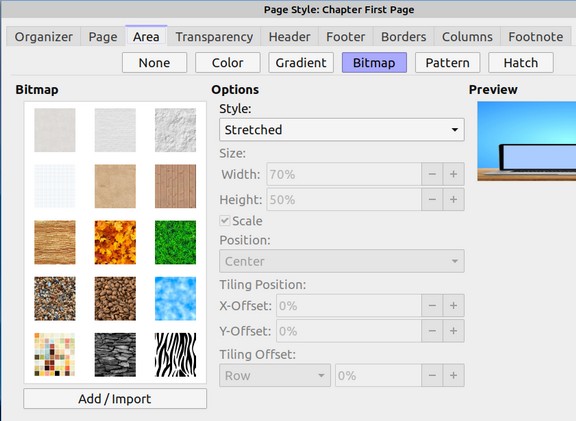
Then for the Style, select the Stretched option so that the image takes up the entire space inside of the borders. Then click OK and OK. We will add our chapter titles and chapter quotations in the next chapter after we create our custom paragraph styles.
Step 5: Create Your Book Preface Page Style
The Book Preface page style, like all of our other page styles, will be based on the Default page style. So right click on the Default page style and click New. Name the style 4-Preface and select Default for the next style. Then click on the Page tab:
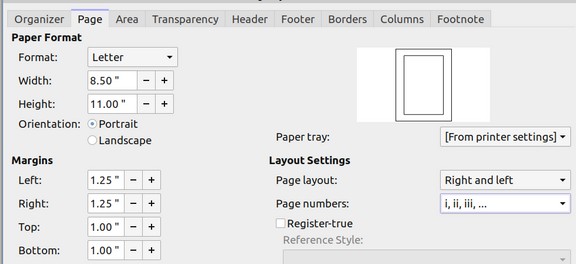
Check that the side margins are 1.25 inches and that the top and bottom margins are one inch. Then change the page numbers from normal (1, 2, 3) to lower case Roman numerals (i, ii, iii). Then click on the Footer tab and match the footer settings for our previous custom page styles. Then click OK.
Step 6: Create your Book Table of Contents Page Style
The Table of Contents is another area to pay special attention to. When readers are deciding whether to purchase your book, they begin by looking at the Book Cover and Book Back Cover. But the next place they are likely to look is the Table of Contents.
The Table of Contents is critical because it includes a list of the most important topics covered in your book. But it is also an opportunity for you to distinguish your book from other similar books the reader may be considering purchasing. The more clearly organized and professionally looking your Table of Contents is, the more likely the reader is to purchase your book instead of some other book.
In the next chapter, we will cover how to use Paragraph styles to customize the appearance of your Table of Contents. But here, we will review how to use a custom page style to create a unique Table of Contents.
The Table of Contents page style is also based on the Default page style. So select the Default page style and click New. Then name the page style 3-Table-of-Contents. For now, change the Next page style to Default. Once we are done creating this page style, we will go back and change the next page style to 3-Table-of-Contents.
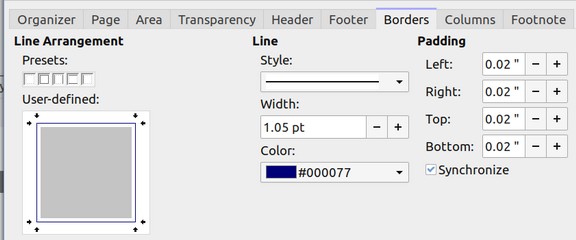
Click the Border tab and click the box to set a border on all four sides of the page. Increase the width of the border to 1 point and change the color of the border to dark blue.
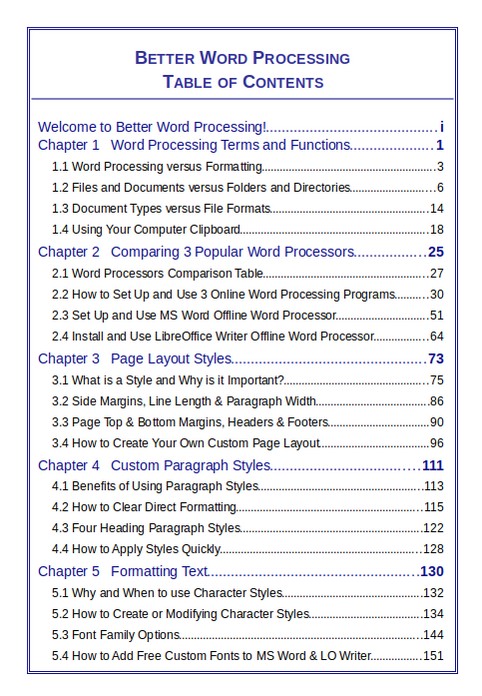
Here is the result of this Table of Contents page style after adding the Table of Contents and customizing the Paragraph styles (which we will do in the next chapter):
Step 7: Create your Book Front Matter Page Style
The Book Front Matter page style is also based on the Default Page Style. So right click on the Default Style and click New. Name the new page style 2-Front Matter. Change the Next Style to Default. Then click on the Page tab.
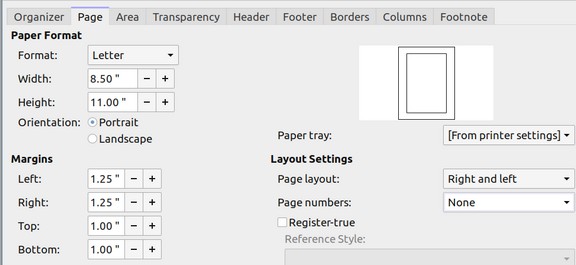
Make sure that the side margins are 1.25 inches and the top and bottom margins are 1 inch. Then change the Page numbers to None – as none of the front matter pages will be numbered. Also none of the Front Matter pages will have a header or a footer. Then click OK.
Step 8: Create your Book Cover Page Style
Your book cover is perhaps the most important page in your entire book – as it is the first thing that readers will see when they look at the print copy of your book. In the next section, we will review how to design a simple book cover. But you should give a lot of attention and effort to creating your book cover.
You should also know that when you submit your book to a Print on Demand (POD) publisher, you will likely submit the document as a PDF without the book cover and then submit the book cover as a separate image file. This means you will have two PDF versions of your book – one with a cover and the other without a cover. It therefore makes sense to use a separate Page Style for your cover. Using a separate page style will allow you to insert your cover as a background image in your book cover page style. It will also allow you to use different margins that are on your Front Matter page style.
The Book Cover page style is also based on the Default page style. So right click on the Default page style and click New. Name the new page style 1-Cover. Then change the next style to Default. Then click on the Page tab.
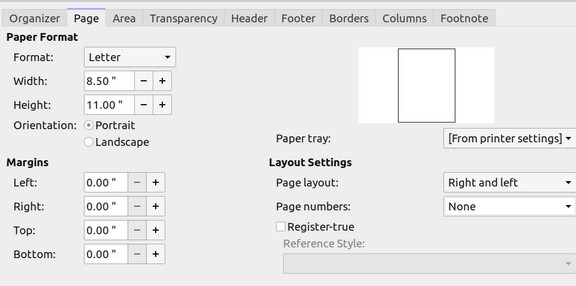
Because we want to add a full width book cover image, change the margins to zero and change the page numbers to none. Then click OK. You may see the following warning:
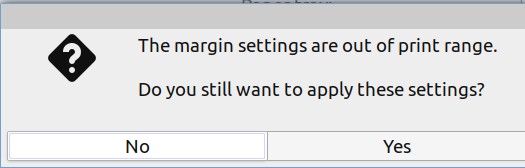
Click Yes. We will add the cover image to this page style after we create it in the next section. You should now have all 8 custom book page styles.
What’s Next?
Now that we have created our 8 custom book page styles, in the next section, we will add each of them to our custom book template document.