This time we will start with LO Writer Character Styles
Creating or modifying character styles in LO Writer is similar to creating or modifying paragraph styles with LO Writer. Open your Default Template. Then open the Styles Panel. Then click on the Character Styles Icon (second from the left). Then right click on a character style and click New or Modify.
For example, it used to be common practice to underline internet links. However, underlined text can be hard to read. Therefore links today are generally not underlined. To change the link character style, right click on it and click Modify. Click on the Font Effects Tab and change underline from single to without.
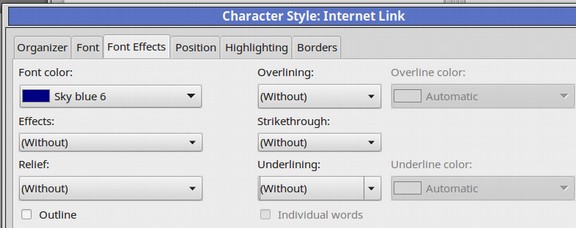
Then click OK. While we are here, we should make the same change to the Visited Link character style. As with paragraph styles, you should avoid mixing character styles with manual formatting. While character styles will override paragraph styles, manual formatting will override character styles. Selecting your text, then clicking on Format, Clear Direct Formatting will get rid of manual styles but it will not clear any character styles. To get rid of unwanted character styles, select the text and then click Styles, Default Character.
How to use and modify character styles with Microsoft Word
MS Word Styles are primarily Paragraph styles.
When you create a style, what you are really doing is creating a new paragraph style.
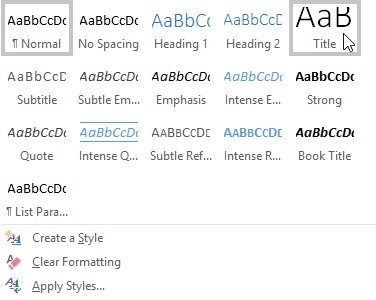
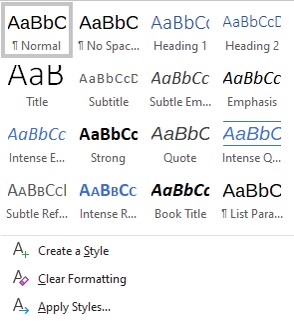
On the Hometab, right-click on the Normal style in the Styles gallery and click Modify. The following screen will appear:
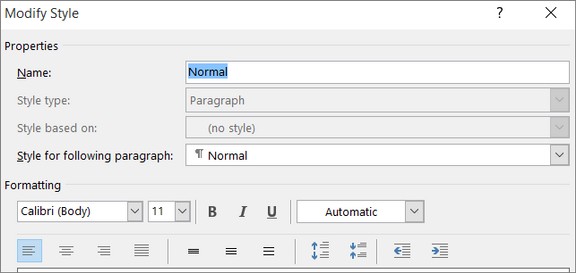
Here you can change the Formatting from Calibri to Arimo (assuming Arimo is installed, see the next two sections). You can also change the font size from 11 to 14. Leave the font color set for automatic.
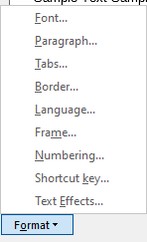
If you click on the Format drop down arrow in the lower left corner, there are many more styling settings you can change:
Also check New documents based on this template.

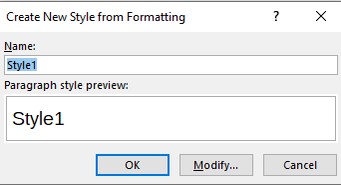
Then click OK. In Word you can modify or create a character style much the same way that you can modify a paragraph style. However, the process is much less obvious. First, from the Home tab, click on the small style drop down arrow in the lower right corner of the Styles section to bring up this screen:
Click Create a Style to bring up this screen:
This looks like this is only for creating paragraph styles. However, it is not. Click Modify.
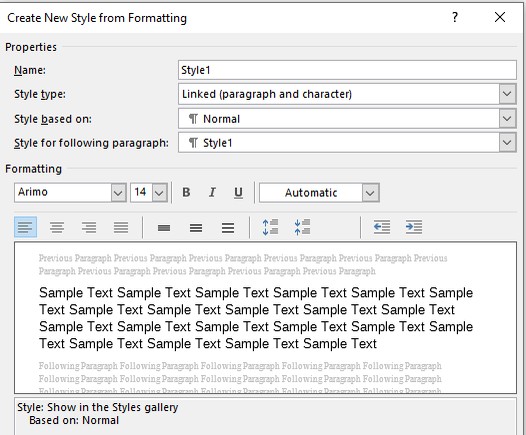
Note that the style type is called Linked (paragraph and character) meaning that it will change both the paragraph and character styles. Use the drop down and select Character for the style type.
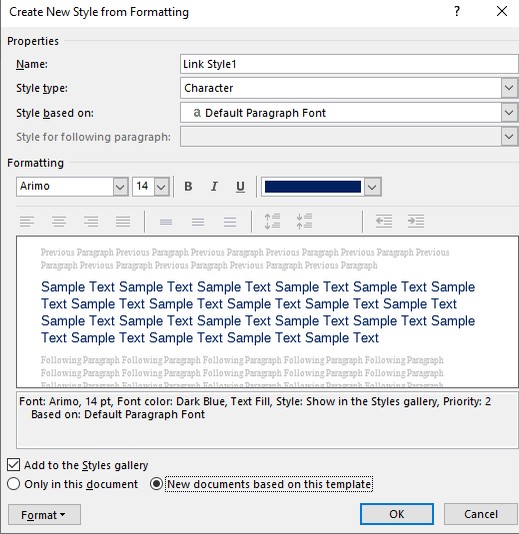
Then change the name to Link Style 1 with the font family set for Arimo, font size set for 14 and font color set for Blue. Check the box New documents based on this template. Then click OK. You can now select any block of text inside of a paragraph and only that block of text will be changed (not the entire paragraph).
This does not work quite as well as the LO Writer character styles because there is no special drop down assigned to just character styles. It is therefore much more difficult to remove or change character styles once they are assigned. But I guess it is better than not having character styles at all.
Quick Styles are Not Styles at all… They are Direct Formatting
In addition to hiding how to create and use Character Styles, MS Word also features something they call “Quick Styles” icons on the Home Ribbon and in the right click (context) menu. These quick style icons are divided into two groups called Font and Paragraph. These quick styles are not styles at all. They are Direct Formatting. The problem with using Direct Formatting is that it has priority over actual Character and Paragraph styles in terms of how text is actually displayed in your document. If you apply Direct Formatting to any text and later try to apply a Character or Paragraph style to that text, the Character or Paragraph style will be ignored.
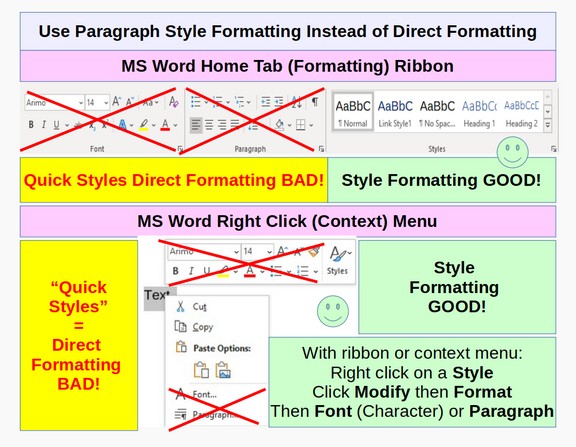
You should therefore avoid using so-called Quick Styles. The whole point of selecting all of the text and clicking on Clear Direct Formatting is to get rid of any possible direct styles that are messing up the appearance of the text in your document.
In Chapter 10, we will demonstrate how inadvertently using direct formatting can interfere with the appearance of Paragraph styles in a book template. But for now, you should be aware that the Quick Styles on the Home tab ribbon are not styles at all and that using them will cause major problems for the appearance of your document. Using Quick Styles is a bad habit to get into. It is only slightly more work to use real Paragraph styles. But it will be much better in terms of creating consistent looking documents.
Do not be fooled by Style Formatting screens that look the same
When you click on a Paragraph style in the Styles group, such as Heading 1 and click Modify, this is the screen that will appear:

Note the Formatting button in the lower left corner of the screen.
Click on Format, then click Paragraph. Then this screen pops up:
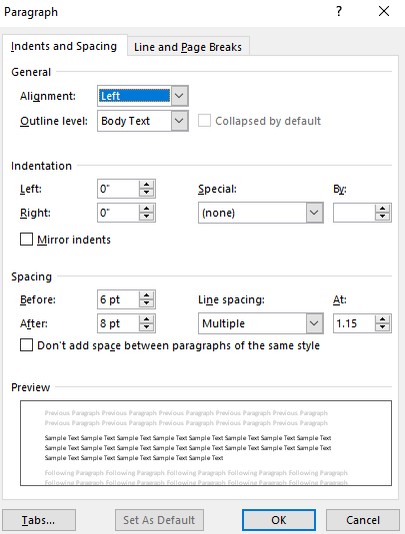
This is the correct place to make changes in the selected Paragraph style.
Now let’s look at the wrong place to make changes. When you click on small arrow in the lower right corner of the Paragraph group on the Home tab ribbon, or you select some text and click on paragraph in the right click context menu, this is the screen that pops up:
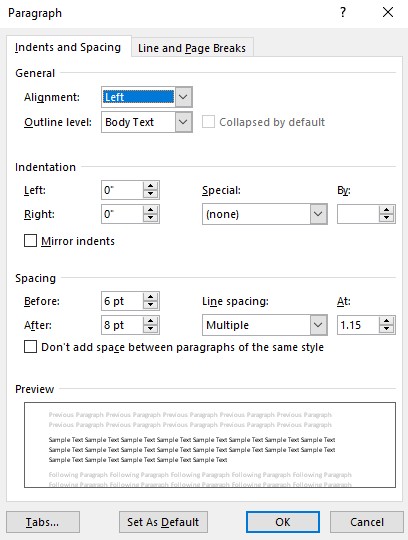
This screen looks identical to the Styles Format Paragraph screen. However it is not. It is a Direct Formatting screen. Any changes made on this screen will over-ride and prevent the use of any settings you make in the real Paragraph Style formatting screen! We will see an actual example of this problem in Chapter 10. For now, be aware that just because two screens in MS Word look identical, this does not mean they perform the same function. In fact, they can be doing quite different things.