In this section, we will add each of the 8 custom page styles we made in the last section as actual pages to our book template document. But before we do this, we need to first create a simple book cover image to use with our book cover page style on the first page of our book template.
Step 1: Create a Simple Cover Page Image
We can always create a better cover image in the future. But we need an image for the PDF version of our book. Note that this cover image will be submitted separately when you submit the book document to a book publisher. So eventually, we will have two versions, one with a Book Cover page style and a cover image followed by the Front Matter page style with the title page – and a second version without the Book Cover page style and without a cover image. The second version simply begins with the Front Matter page style and a first page that is the title page.
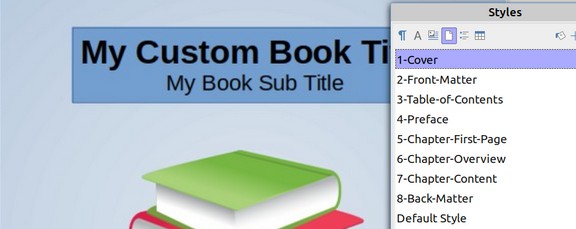
To create a simple book cover image, click on File, New, Drawing. Then save the drawing file to your Custom Book Template folder as My Simple Book Cover. Insert a Text Box and type in the box My Custom Book Title, Enter a new line and type My Book Sub Title. Then create a second feature box and type in Authors Name Here. Then click on Page, Properties, Background and change the background color to a blue radial gradient.
Then click on View > Gallery. scroll down to the School section. Select, then copy and paste the Book clip art into the drawing. Then use Shutter or some other screen capture tool to capture and convert the drawing into an image.
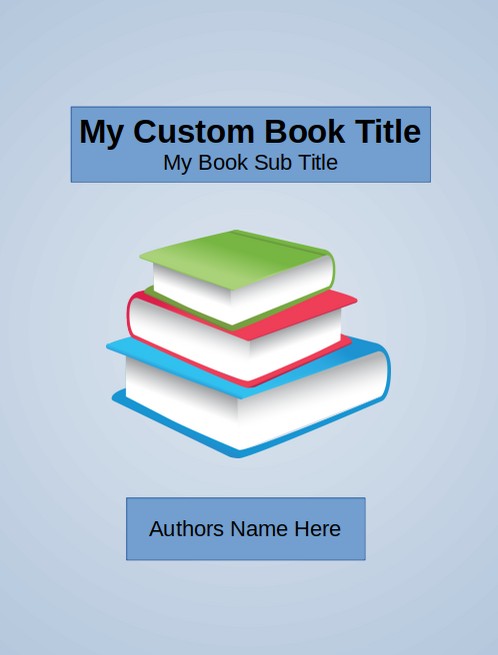
Copy and paste this image into a blank Writer document. Then right click and compress the image. Then save the image as book-cover dot jpeg to your book template folder. Then save and close your Simple Book Cover Libre Draw document.
Step 2: Insert your Cover image into your Custom Book Template document.
Go back to your Custom Book Template document. Then select and delete the first sentence (My Custom Book Template) in the document so that the first page is completely blank.
Then with your cursor at the top of this first page, and with your Styles Panel open, click on the 1-Cover Page Style.
This will convert your first page from the Default Page Style to the 1-Cover Page Style.
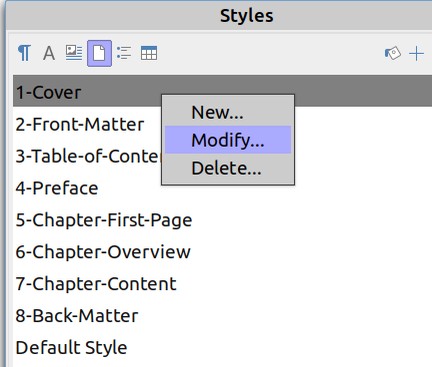
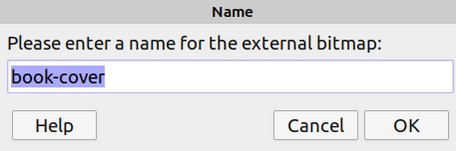
If you look closely, you will see that your cursor has also moved into the upper left corner of the document – because our Book Cover page style does not have any margins! Then click right click on the Book Cover page style and click Modify to edit the Book Cover Page Style. Click the Area tab. Then in the area tab, click Bitmap. Then click Add Import. This will bring up your File Manager. Select your book cover image. This window will appear:
Click OK. Then change the Options Style from Tiled to Stretched.
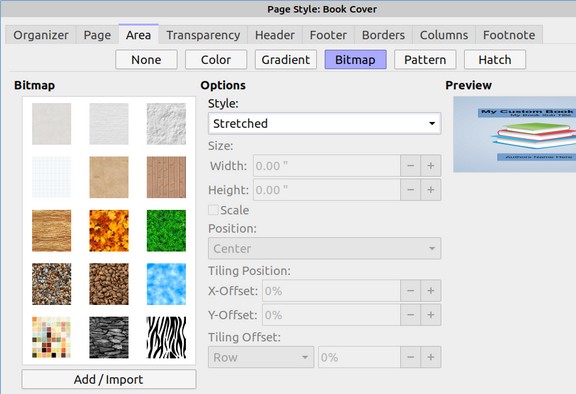
This will make the book cover image take up the full width of the page. Then click Apply. then click OK. This will insert your cover image into the first page of your Book Template document.
Step 3: Add a second blank Cover Page
Before we add our Front Matter page style, we want a blank cover page with the Default Page style after our Cover image so that our Front Matter begins on an odd numbered or right hand page.
To insert this extra blank Default page, go to the upper right corner of the Cover page and click Insert > Page Break. This will create a new blank page assigned to the Default page style.
Step 4: Add a Special Manual Page Break and assign it to the Front Matter Page Style
If we want to insert a custom page style into our document, the safest and surest way is to insert a special page break. To do this, place your cursor where you want the special page break to occur. Then, in the main menu, click Insert > More Breaks > Manual Break. This will bring up the following screen:
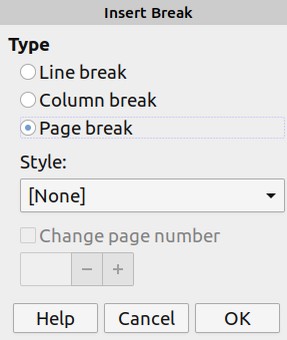
Change the Style from None to 2-Front-Matter. Then click OK. We now have a Cover Page with a background image, a blank page using the Default Page style and a blank page using the 2 Front Matter page style.
You can tell there are page breaks by looking for the dashed lines between pages. The inserted page break is indicated by a dashed line at the top of the new page. Here is what the top of a page looks like moving to a new page with a page break:

Here is what the top of a page looks like moving to a new page without a page break:

You can right click on a page break to edit it or delete it.

Click on Edit Page Break to bring up the following screen:
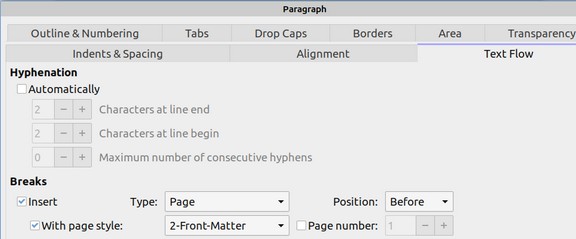
Page breaks are a part of the Paragraph style and are under the Text Flow tab. This page break uses the 2 Front Matter page style. You can change any page style to another page style at this screen. Click OK.
You can also tell which page style is being used on any screen by clicking on the page header or clicking on the page when the Styles window is open:
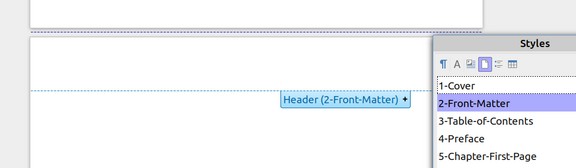
Both of these methods indicate that this page is using the 2 Front Matter page style.
Warning: While you can insert a page break by pressing Ctrl+Enter, this keyboard shortcut method will not allow you to assign a different Page Style to the new page. Since the main point of inserting a Page Break in your book is to assign the new page to a different page style, we will always use the main menu to insert each manual page break.
Step 5: Add 5 More Front Matter Sections
The first front matter page is the title page. So type: This is the Title page. Then at the end of this sentence, click Insert, More Breaks, Manual Break. Choose the 2 Front Matter Page style and click OK.
The second front matter page is usually a blank page after the title page. The third front matter page us usually the copyright and publisher page. The fourth page is typically the Dedication page. Other front matter pages include a “What this book is about” page, an “About the Author” page, and an Acknowledgments page.
Step 6: Add a Table of Contents page
We will add the actual Table of Contents in the next section after adding our custom Heading Paragraph styles. But here we will add the actual page to put our Table of Contents on. After inserting all of these manual page breaks and page names for our front matter pages, we are ready to insert a manual break to add the Table of Contents page. Go to the bottom of your last Front Matter page and place your cursor after the last word in the last sentence. Then in the top menu, click Insert, More Breaks, Manual Break.
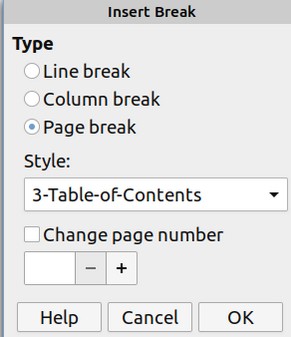
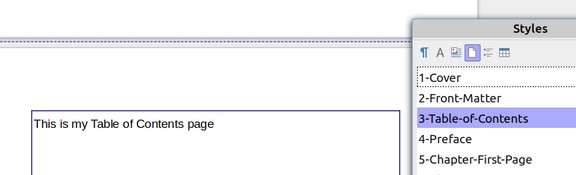
Use the drop down arrow to select the 3 Table of Contents page style. Then click OK. This will result in a new page being created with a blue border but nothing else on the page. Type This is my Table of Contents page. Here is the result:
Step 7: Add a Preface page
After inserting your Table of Contents page, we are ready to insert a manual break to add the Preface page. Click Insert, More Breaks, Manual Break:
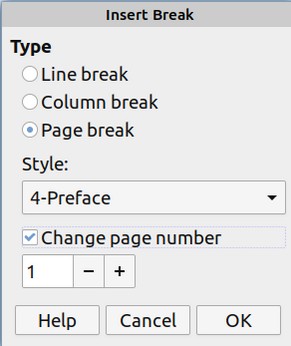
Here we will also change the page number by checking the box and then entering 1 for the page number. Then click OK. Type at the top of this page “This is our Preface first page.” Then scroll to the bottom of the page where you will see the line for the top of the footer. Click below this line and click on the Align Center icon. Then type “Book Preface Page.” Then enter a space and in the main menu, click Insert, Page Number. The page number will be inserted as a lower case roman numeral.

Step 8: Add a Chapter One First Page
We need to restart the page numbers with the first chapter first page. So click Insert, More Breaks, Manual Break. Then select the 5 Chapter First Page style and reset the page number to 1.
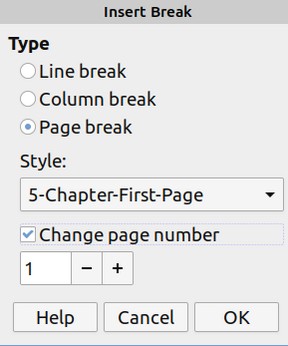
This will insert a new page with your Chapter background image on it.
Type: “This is Chapter 1 First Page.”
Step 9: Add a Chapter One Overview page
With your cursor at the end of the sentence on your Chapter One First Page, click Insert, Page Break. Assuming that your Page Style Organizer, Next Style has been set properly, the new page should automatically be set for the 6-Chapter-Overview page style. Type “This is the Chapter 1 Overview page.” Then scroll down the page and you will see a blank footer. Type in “Chapter 1 Page“. Then add a space. Then, in the main menu, click Insert > Page Number.

The reason the Overview page is Page 2 is because Page 1 was the Chapter First Page with the background image. It counts as a page even though there is no footer on the Chapter 1 First Page.
Step 10: Add a Chapter Content page
Place your cursor back at the end of the sentence in the Chapter 1 Overview Page and click Insert > Page Break. This should insert a new page with the 7-Chapter-Content page style. Scroll down to this new page where you will now see a colorful header. Type into the header. “This is the name of my book. “

Below this header in the main content area, type: “This is the Chapter 1 Content section 1.” Then scroll to the bottom of the page and in the footer type: “Chapter 1 Page”. Then click Insert Page Number. It should show as page 3.

Step 11: Add three more sections to the Chapter 1 Content
Just as we divided the Front Matter into several sections, each of which uses the Front Matter page style, we will divide each of the chapter content areas into four sections, each of which uses the Chapter Content page style.
Place your cursor back in the content area of the Chapter 1 Section 1 Page and click Insert > Page Break. You will note that the new page already has your book header name and book footer name and page numbers inserted. All you need to do is type on the new page “This is the Chapter 1 Content section 2.”
Then insert another page break and type “This is the Chapter 1 Content section 3.”
Then insert another page break and type “This is the Chapter 1 Content section 4.”
Scroll to the bottom of this page and you will see that Chapter 1 now has 6 pages. Adding all of these page breaks and page styles and page numbers will give us a good understanding of how to structure our book. We will leave the remaining chapter sections and back matter pages to be added later.
What’s Next?
In the next section, we will look at how to using heading paragraph styles in Libre Writer to create and style a custom Book Table of Contents.