Feature boxes are blocks of text typically found in business reports and educational books that emphasize an important point or concept that the author or instructor would like readers to remember. Here is an example of a feature box made with a simple one row table:
|
Key Point |
This is an important point we hope you will remember. The only way to tell for sure how a feature box will look like in an Ebook or website is to test the feature box in both an Ebook and website before you make your final decision! |
Rather than filling up page after page with nothing but text, what we want to do is alternate text with an image, then more text, then an image or a feature box, then more text. This variation helps keep our readers focused on important parts of the text and helps them move our ideas from the short term storage area of their brain to the long term area by activating different parts of their brain as they read.
In this section, we will describe the process for creating feature boxes using simple tables. Making a feature box with a table is easy because it is basically just two cells in a single row. The appearance is relatively stable in documents, books, Ebooks and websites because each of these information sharing formats support tables. Using tables to make feature boxes is the best way to assure a consistent appearance across all learning platforms. While you can also create feature boxes using custom paragraph styles, it is likely that these custom paragraph styles will not export well to other formats like web pages and Ebooks – which is why we recommend using tables to create feature boxes. Below are the steps you can use to create your own custom feature boxes.
Step 1: Find and Modify Feature Box Icons
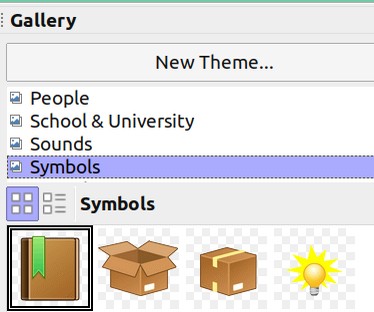
We will create 12 different feature boxes you can copy and use in your instructional books. Before we create these feature boxes, we need to come up with the 12 icons we will use to create our 12 feature boxes. This can be done quickly using the transparent icons already in the LO Writer gallery. Open a new Writer document. Then click on View, Gallery. Then click on the Symbols category.
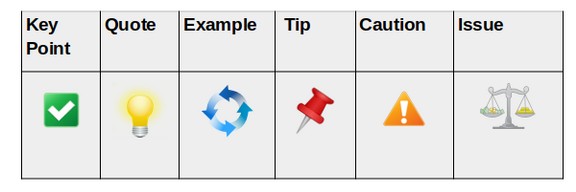
We will use the green check mark, the light bulb, the blue circle, the red tack, the orange warning triangle, the red question mark, the blue earth and the magnifying glass. Copy and paste these icons into a blank Libre Writer document. Then right click and compress each – being careful to click on the PNG option so that the images will remain transparent. Then right click on each again and click on Properties, Size and reduce the size of each to 0.50 inches by 0.50 inches. Then in a special document you will save, create a new table with two row and 6 columns. Then copy paste the icons into these columns.
The following images were all taken from Libe Writer View Gallery. They were all transparent SVG images. But we have converted them into transparent PNG images with Right Click Compress PNG Compression. By default, all images are anchored to the succeeding paragraph. This property and resizing should be adjusted before copy pasting into a table as described below.
Transparent PNG Images for our 6 Feature Boxes:
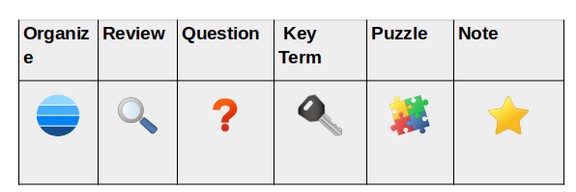
Transparent PNG Images for next 6 Feature Boxes
Step 2: Create Our First Feature Box Custom Table
While you can create a table from Table, Insert Table, it is quicker to add the Table Icon to our Standard Tool Bar. Then just click on the small arrow to the right of the table icon and select one row with two columns.
|
|
|
There are several steps to setting up our first feature box table. But once one Feature Box table is made we can simply copy paste the table into a special Feature Box Table document and then use this to copy and paste feature boxes into our section and chapter documents whenever a feature box is needed.
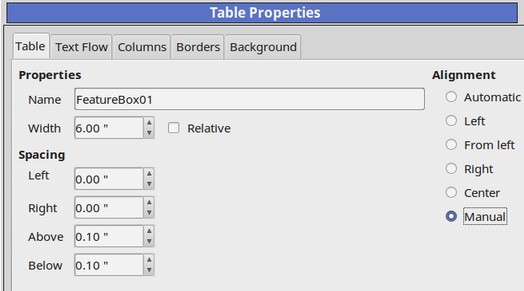
Right click any place in the table. Then click Table Properties. Then click on the Table Tab and name it FeatureBox01. Change alignment to Manual and set the width for 6 inches. This assumes our Page Style has been set to 6 inches (8 ½ inches minus 1.25 inch margins).
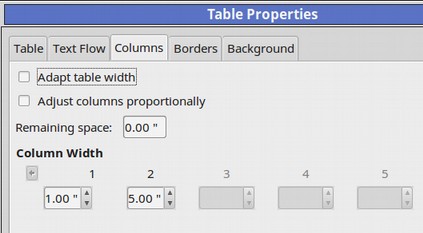
Then click on the Columns tab. Change the first column to 1 inches and remaining space to 0 inches. This makes the right cell 5 inches.
Click on the Borders tab. Make sure it is set for No Border as borders are not well supported in Epub documents. Then click on the Background tab. Set the right cell for a light color.
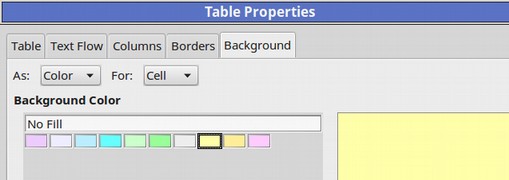
Then click on the left cell and click on Table Properties again to set the left cell for a darker color. Then click OK. Here is what our feature box now looks like:
|
|
|
Step 3: Add your custom Text to your Feature Box Table
Type the word Caution in the left box. Open the Styles Panel and you will see that text placed in a Table is styled with a Paragraph style called Table Contents. Right click on this Paragraph Style and create a new style called Table Contents Box Title. Set this style to No Indent, Center Alignment and 12 Bold not italic. Then select the text and click in this new style to apply it. But do not enter a new line below it.
Step 4: Add your Transparent PNG Image to the Left Cell
Add a 50x50 png warning triangle just to the right of the word Caution. The cell will force the text to drop below the image. Finally add some text in the right box. Then select it and modify the Table Contents style to put 0.10 inc of spacing before text indent. Here is the result: Caution Feature Box
|
Caution |
This is an important warning we hope you will remember. You may think that your feature boxes will look the same on both print books and Ebooks – but really they could look completely different. Always look before you leap! |
Step 5: Create our Second Table Based Feature Box
Copy the above feature box to make our second one. Change the background color of the left cell to medium green and the background color of the right cell to light green. Then change the title to Key Point and change the icon to a green check mark copied from our table of feature box icons. Key Point Feature Box
|
|
This is an important point we hope you will remember. The only way to tell for sure how a feature box will look like in an Ebook or website is to test the feature box in both an Ebook and website before you make your final decision! |
Step 6: Create any additional Feature Box Tables
Repeat the process again this time with a blue background to make the Quote Feature Box:
|
|
This is a quote from a famous person who happens to agree with the point we are trying to make… “Good things come to those who wait – provided they do not die in the mean time!” - Samuel Clemens aka Mark Twain |
Repeat the process again this time with a reverse blue background to make the Example Feature Box:
|
|
If nothing else, making all of these table based feature boxes is helping you put the Table Properties window in your long term memory! |
Repeat the process again this time with a purple and blue background to make the Tip Feature Box:
|
|
If nothing else, making all of these table based feature boxes is helping you put the Table Properties window in your long term memory! |
Repeat the process again this time with a pink and blue background to make the Issue Feature Box:
|
|
There are some people who think that a table is the only way to make a feature box. In a few minutes, we will learn a couple of other ways to make more complex feature boxes. |
Repeat the process again this time with a blue and light gray image background to make the Special Feature Box:
|
Organize |
We are now done making these table based feature boxes. Time to copy paste them into a special document so we can just copy paste them whenever and where ever we need them in our book. |
Repeat the process again this time with a sky blue and light blue background to make the Review Feature Box
|
|
This is a review of material we have already covered but we wanted to remind you about it in case you had forgotten or maybe did not understand in the first place. |
Solving Feature Box Website Display Problem
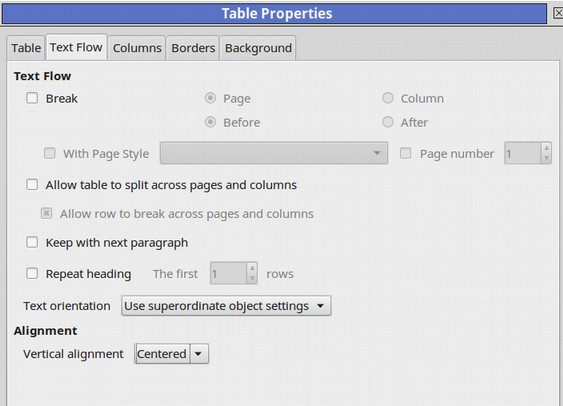
Website table will not display properly unless the Text Flow boxes in the Table Properties screen are unchecked and Vertical Alignment is set for Center as is shown below:
We also need to select the left cell in each feature box and make sure it is also vertical alignment centered. Both left and right cells have to be center aligned.
There may also be some other issue with the line formatting because when deleting and then putting paragraphs back, feature boxes that did not display properly on Ebooks or web pages suddenly start displaying properly.
To center the Feature Boxes and center tables on Ebooks or web pages, just right click on table and click Table Properties. Then click Align center. You can also set width fixed with table properties. Also put a line break after each feature box to make up for the paragraph spacing that has 10px below and none above.
Replace Text Boxes with Images or Simple Tables
Another common element that has trouble being converted to Ebooks and web pages is the Text Box. Therefore, it is best to replace text boxes with images or simple tables. Here is an example of a text box that has been replaced with an image after the text box was created.

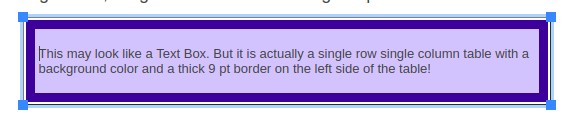
Here is a Single Row, Single Column Table taking the place of a Text Box:
|
This may look like a Text Box. But it is actually a single row single column table with a background color and a thick 9 pt border on the left side of the table! |
The above table was manually set with Table Properties to be 5.5 inches and then centered in the page.
How to Put a Thick Left Border in a Table on a Web Page
Some things are a little harder to accomplish with HTML editors used for web pages than they are for Word Processors used to create books. Putting a single sided border on a table row is one of those things. Borders are considered Table Cell properties. Therefore to change them with your HTML editor, you need to open the Table Cell Properties screen and click on the Advanced tab:
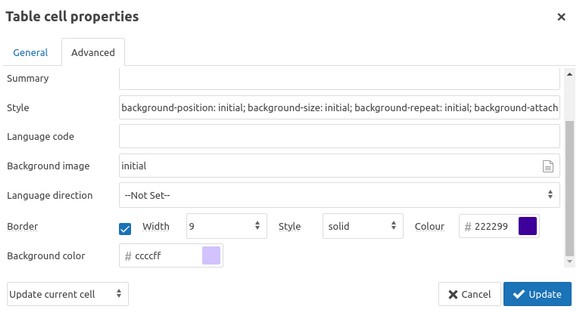
Unfortunately, the above screen only allows you to place a thick colored border all the way around the cell. Click Update and you will see this:
You can click on the source code after creating this border and saving the change to your server. Look for the section that begins with td (which stands for table data and in fact means table cell) and you will see this:
<td style="background: #ccccff; width: 508px; border: 9px solid #222299; vertical-align: top;">
To change the border from all the way around to just the left side, change the border property from the word border to the word border-left (border dash left). Then save the change and view the table again. Here is the result:

This can be a lot of work just to create a feature box on a web page. Therefore, some authors instead create a special paragraph style to accomplish something similar.
How to Create a Feature Box with a Paragraph Style
We have already covered how to create a custom paragraph style. So this is a bit of a review. We will cover the process for Libre Writer but the process for MS Word is about the same.
First, click on Styles, Manage Styles to open up the Styles window. It will likely open to Paragraph Styles, Text Body. Right click and click New to bring up a new Paragraph Styles screen:
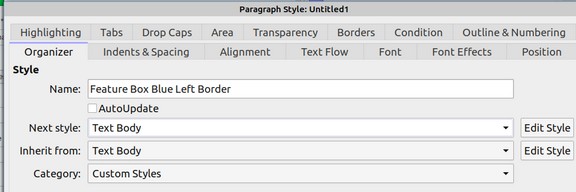
Click on the Organizer tab. You can name the new paragraph style anything you want. We will call it Feature Box Blue Left Border. Change the next style to Text Body so that Writer will go back to that style when you hit enter on your keyboard to start a new paragraph after finishing your Feature Box text.
This new style will be exactly like the Text Body style but with the following changes:
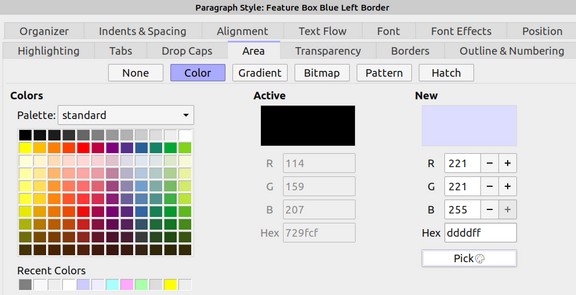
Click on Area and change the background to a light blue:
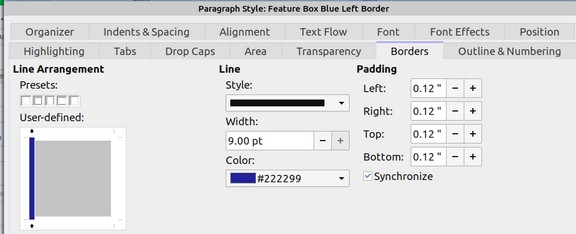
Then click on the Borders tab and place a left border into the screen and change its thickness to 9 pts and its color to dark blue. Also increase the padding inside the borders from 0.02 inches to 0.12 inches.
Then type a sentence:
This is my first feature box made with paragraph styles.
Copy and paste the sentence. Then select the new sentence and click on the Feature Box Paragraph Style:
This is my first feature box made with paragraph styles.
You will then need to add an equivalent paragraph style to the custom CSS file for your website. We go into CSS in a different book called Learn HTML and CSS. But for the curious, the CSS style or class for the above feature box would look something like this:
.feature-box {
border-left: 9px solid #222299;
background-color: #ddddff;
padding: 12px;
}
Note that a pixel is about one one hundredth of an inch and therefore 0.12 inches in Libre Office Border padding is about 12 pixels in CSS padding.
Folks who use the paragraph method of creating feature boxes often have all kinds of colors for various feature boxes and therefore set up multiple custom paragraph styles.
What’s Next?
This concludes our sections on tables and feature boxes. In the next section, we will look at how to format lists.