There are a couple of drawbacks to LibreOffice. The first is that it does not come with as detailed of a color selector as MS Office. The second is that it does not come with a Gradient Background selector. In this article, we will review how to add custom colors to the default color selector and how to use these custom colors to create custom gradient background colors for text boxes and diagrams.
How to Add Custom Colors to LibreOffice
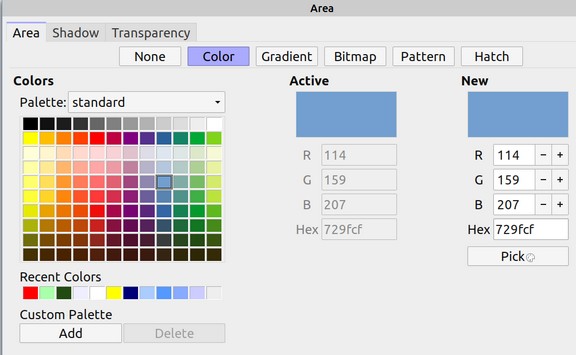
From LO Writer, click File > New Drawing to open a Libre Draw document. Then click Format > Area to see the Standard Palette:
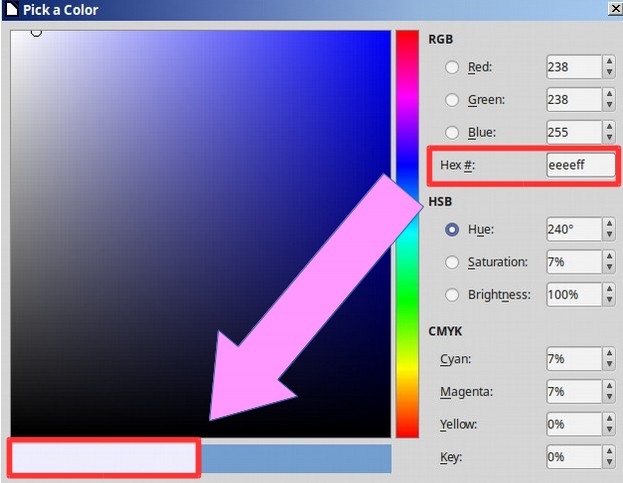
To add a new color, first click on the Pick button, then chose a New color. Below, we have added a very light blue color by typing the hexadecimal value eeeeff into the Hex # box. The new color appears in the lower left corner of the screen.
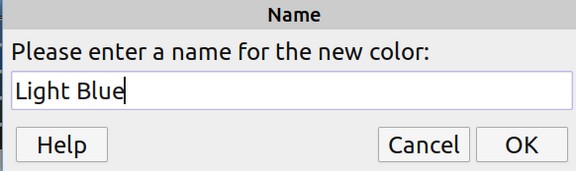
Then click OK. Then click the Add button and give the new color a name.
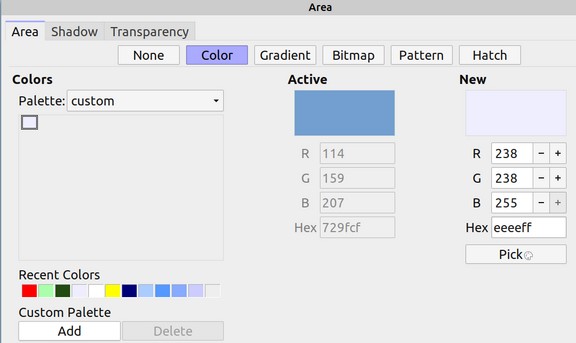
Then click OK. Your custom palette screen pops up with this color:
To return to the Standard Palette screen, use the drop down arrow to the right of the word custom. Sadly, you cannot add colors to the Standard Palette. So when you add new custom solid colors, always use your Custom Palette.
As an exercise, you can create your own custom palette using the hexadecimal values we have provided in the table below. However, you can also just download a free custom palette at our course website. To add this file to your LibreOffice program, open an LO Writer blank document and click Tools, Extension Manager and click Add. Then navigate to the downloaded file, called Custom Palette dot oxt and click on it. It will appear in your list of added extensions:

Then close the Extension Manager. A screen will appear explaining that you need to close all Libre Office documents and restart Libre Office for the new custom palette to take effect. Click Later in order to give you time to save and close all of your documents. Then restart LO Writer or LO Draw to open up a new blank Draw document. Click on Format, Area, Color and change the Palette from custom or Standard to Custom Palette using the drop down arrow.
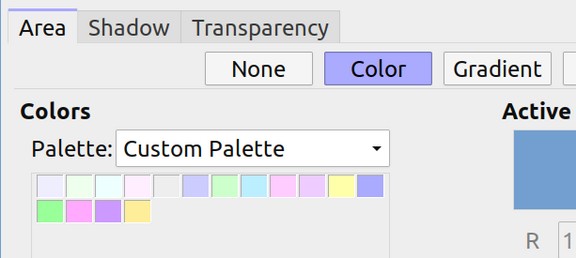
These are the 16 custom background colors we will use during this course and several other courses.
These 16 colors are also the base colors for our gradient background colors. Each of these 16 custom colors was created by clicking “Pick” Then using the Hexadecimal option to create the color. Then click OK. Then click Add and give the color a name. Below is a table of hexadecimal values for our custom light background colors.
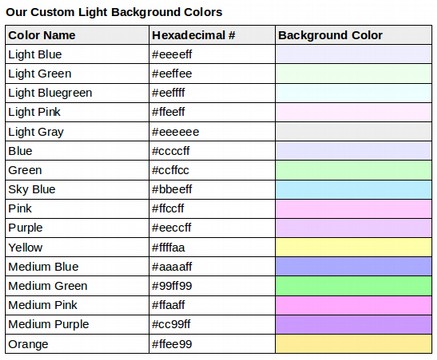
Our Custom Light Background Colors
|
Color Name |
Hexadecimal # |
Background Color |
|---|---|---|
|
Light Blue |
#eeeeff |
|
|
Light Green |
#eeffee |
|
|
Light Bluegreen |
#eeffff |
|
|
Light Pink |
#ffeeff |
|
|
Light Gray |
#eeeeee |
|
|
Blue |
#ccccff |
|
|
Green |
#ccffcc |
|
|
Sky Blue |
#bbeeff |
|
|
Pink |
#ffccff |
|
|
Purple |
#eeccff |
|
|
Yellow |
#ffffaa |
|
|
Medium Blue |
#aaaaff |
|
|
Medium Green |
#99ff99 |
|
|
Medium Pink |
#ffaaff |
|
|
Medium Purple |
#cc99ff |
|
|
Orange |
#ffee99 |
Here is an image of the above table:
Here is an image of our Custom Palette after manually adding all the above colors (as opposed to downloading the Custom Palette from our website):

Once we have our very light background colors added as a Custom palette, either by manually adding them or adding them as an Extension, we are ready to create new light gradient background colors.
Create New Linear Gradient Background Colors
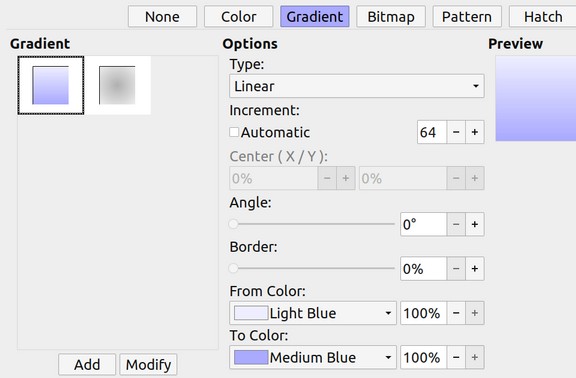
Open a new Libre Draw document. Then click on Format, Area. Then click on the Gradients tab. Here is the default gradient screen:
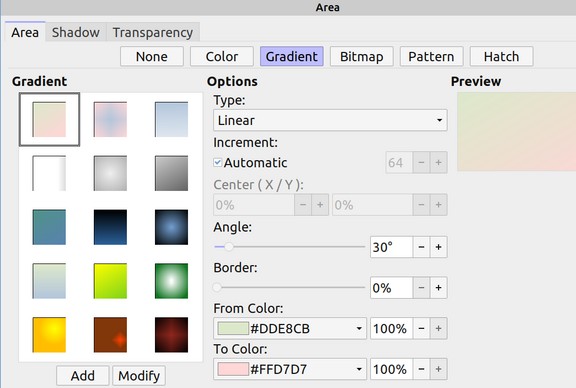
This is a very ugly and confusing set of 15 gradient colors – none of which are suitable for background images. We will therefore make our own custom gradient background colors. Note that the first gradient in the upper left corner is Light Tan to Light Red at a 30 degree angle. Change the angle to 0%. Then use your custom color palette to change the top color to Light Blue. Then change the bottom color to Medium Blue.
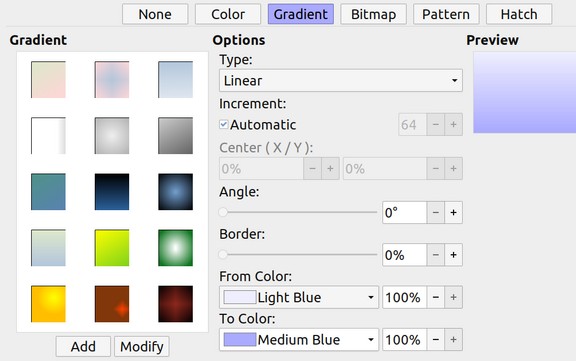
Then click Add and name the gradient Light Blue. Click OK. This gradient will be added to the list but you may not be able to see it because the screen may be limited to 15 colors. To make room for our new gradient colors, right click on the Pastel gradient color in the upper left corner:
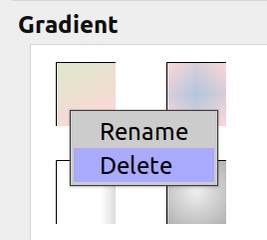
Click Delete then click Yes. Then select and delete all the other gradient colors except Radial Gray. Do not worry if you accidentally delete the radial gray or light blue gradients as they are easy to add back in. When you are done deleting the default gradients, your screen should look like this:
Change the From color to Light Green and the To color to Medium Green. Then click Add and name it Light Green. Add Light Pink, Light Yellow, Light Purple and Light Sky Gradients using these same steps.
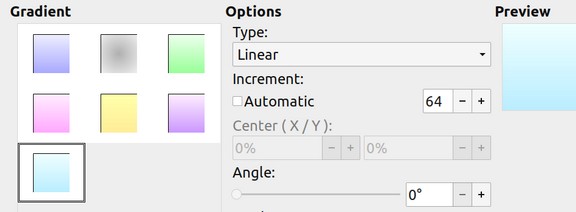
Now that we have 6 light Linear gradient background colors, we are ready to create our Radial Gradient background colors.
Create 6 New Radial Gradient Background Colors
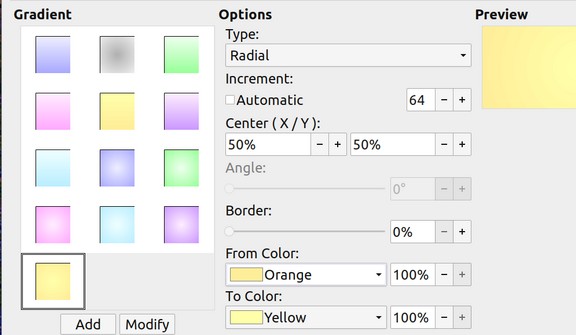
We will next use the Radial Gray color to create some radial gradient background colors. Click Radial Gray to select it. Then change the From color to Medium Blue and the To color to Light Blue.
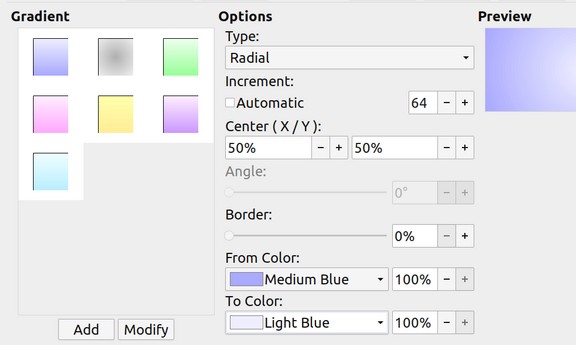
Then click Add and name it Radial Blue. Repeat to create Radial Green, Radial Pink, Radial Sky, Radial Purple and Radial Orange. When we are done, here are our Linear and Radial color options:
Click OK to close this screen and then close LO Draw and restart Libre Office.
How to Save our Custom Gradients Palette to Transfer to other Computers
Unfortunately, our Custom Gradient color palette cannot be exported and installed via the Extension Manager like our Custom Solid Color palette can. Instead, we need to find the exact location of the existing LibreOffice gradient file and then copy it so in the future we can share this palette with others and/or use it to replace the ugly Gradient palette that comes with LibreOffice.
The fine folks at LibreOffice have moved this file around over the years just to keep us on our toes. But for now, this is the current location of this file. Open your File Manager. Then right click and click Show Hidden Files. Then click on the dot config folder to open it. Then click on the LibreOffice folder to open it. Then click on the 4 folder to open it. Then click on the User folder to open it. Then click on the Config folder to open it. Then open the standard.sog file to verify it has the changes you made. Then close and copy this standard.sog file. Then put this file in your Libre Office Extensions folder. Should you replace either Linux Mint or LibreOffice in the future, you can add this file back to the new installation by renaming the default gradient file something like xstandard.sog. Then copy and paste the custom standard.sog file into this folder. Then Save and Close.
We now have our solid background colors, linear gradient background colors and radial gradient background colors installed in LibreOffice which we will use to create documents for our books and websites.
What’s Next?
In the next article, we will review how to create a diagram with Libre Draw.