Step 1: Use a Section Break to insert the Chapter First Page Section
Place your cursor in the content area of the Preface page and click Layout > Breaks > Section Break > Next Page.
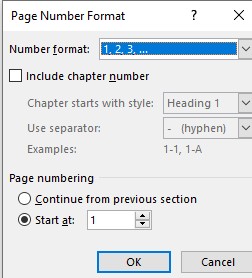
Then in the new page, type “This is Chapter 1 First Page.” Scroll down the page and you will see that the Preface footer was carried forward to our new section with lower case roman numerals. For the rest of the book, we want normal numbers. With your cursor on the Chapter 1 page 1, click Insert > Page Numbers > Format Page Numbers. Then change the Number format to 1, 2, 3.
Then click OK. Then click Insert > Footer > Edit Footer.
Change the text of the footer to “Chapter 1 Footer… Page”
Then close the footer. Sadly, this made our Preface footer have this same text. So click Insert > Footer > Edit Footer. Then click Link to Previous to turn it off.
Then go to the Preface footer by clicking on Previous in the top ribbon. Then change the text of the section 3 footer to: Preface Footer… Page
Then close the Header and Footer.
Step 2: Use a Section Break to insert the Chapter Content Section
Place your cursor in the content area of the Chapter 1 First page and click Layout > Breaks > Section Break > Next Page.
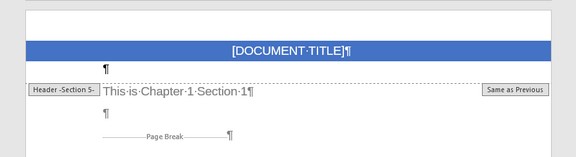
Then type This is Chapter 1 Section 1
The reason we needed to use a MS Word Section break is that our Chapter sections are going to have headers and footers. So we will need a new section to create this.
With your cursor on this new page, click Layout > Margins > Custom Margins.
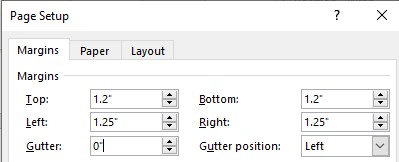
Because this and the following page will have a header taking up 0.20 inches in the margins, we need to increase the top margin to 1.2 inches – just as we previously increased the bottom margin to 1.2 inches to make room for the footer in the margins and still leave one inch of actual margin at the top and bottom of the page. After increasing the top margin to 1.2 inches, click OK.
Next click Insert > Header > Banded.
Sadly, this placed the same header in the Previous sections including the Cover page section 1. Go to Section 2 and click on Link to Previous to break the link to the header in Section 1. Then go to the Section 1 header and click on it. Then click Insert > Header > Remove Header. Then go to the Section 2 header and click on it. Then click Insert > Header > Remove Header.
Because Section 3 and Section 4 are still marked Same as Previous, the headers on these sections will also be removed. This leaves only the header on Section 5 pages – which is what we want.
Replace the document title field with the text “This is the title of my book.”
Scroll down to the footer and you will see that there is a problem. The page numbers were restarted with the new section. So with your cursor on the Chapter 1 Section 1 page, click Insert > Page Number > Page Number Format.
Then change the Page Numbering from Start at 1 to Continue from the previous section.
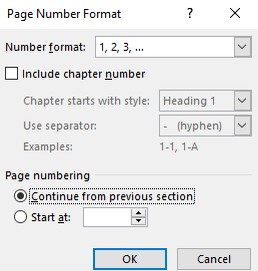
Then click OK.
Important Tip: If your page numbers are not displaying the way you want, make sure the “Link to Previous” option is selected or un-selected. If your page numbers still aren’t connecting, go to Insert > Page Numbers Page Number Format and click “Continue from previous section.”
Step 3: Use Page Breaks to insert the remaining 3 Chapter Content Sections
Enter a couple of paragraph breaks. Then click Insert > Pages > Page Break.
Then type This is Chapter 1 Section 2
Enter a couple of paragraph breaks. Then click Insert > Pages > Page Break.
Then type This is Chapter 1 Section 3
Enter a couple of paragraph breaks. Then click Insert > Pages > Page Break. Then type This is Chapter 1 Section 4
Enter a couple of paragraph breaks. Then click Layout > Breaks > Section Break > Next Page. Then type, This is Chapter 2 Page 1
Sadly, this placed our header at the top of the Chapter 2 First Page.

Place your cursor in this Header and click Insert > Header > Edit Header. Then scroll down to Section 6 and click Link to Previous in the top ribbon. Then click Insert > Header > Remove Header.
Step 4: Add a Back Matter Section and Page
While the Front Matter section includes everything before the Preface – and by custom front matter pages have no header, no footer and no page numbers, the Back Matter section includes everything after the end of the last chapter – but may or may not have a header, a footer and or page numbers depending on how many pages are in your back matter section.
We will use the Back Matter page(s) to provide the reader with suggestions for additional reading. This is particularly useful if you as the author have written additional books on similar subjects or if this book is part of a series of books or if your book links to one of more websites you want the reader to know about.
To add the Back Matter section, place your cursor in the content area of the Chapter 2 Page 1 page. Then click Layout > Breaks > Section Breaks > Next Page.
Then type: “This is the Back Matter Section. We will use it to change the formatting by eliminating the header by continuing the footer.”
Since our Chapter First Page does not have a header, this new section will not have a header either. But we want to delink the header in this section from any previous section. Therefore, click on
Insert > Header > Edit Header
Note that the header says “Same as Previous”. Click LINK to PREVIOUS in the top ribbon to remove this. Scroll down to the footer. Unfortunately, the footer has restarted page numbers in this section as Page 1. It has also made the Previous chapter 2 first page Page 1. So with your cursor on the Chapter 2 First Page, click Insert > Page Number > Page Number Format. Then change the Page Numbering from Start at 1 to Continue from the previous section.
Then with your cursor on the Back Matter Page, click Insert > Page Number > Page Number Format. Then change the Page Numbering from Start at 1 to Continue from the previous section.
Step 5: Check the Appearance of our Custom Book Template
We have now completed setting up the first 6 MS Sections of our custom book template. Save the custom book template as a PDF and review it. We still have several problems. First, there is what space for a header at the top of our cover page. Second, the footers do not have a top border. Third, our headers do not have a bottom border. We will fix all of these problems in the final section of this chapter.
What’s Next?
In the next section, we will add paragraph heading styles to our custom book template which we will then use to insert our Table of Contents.