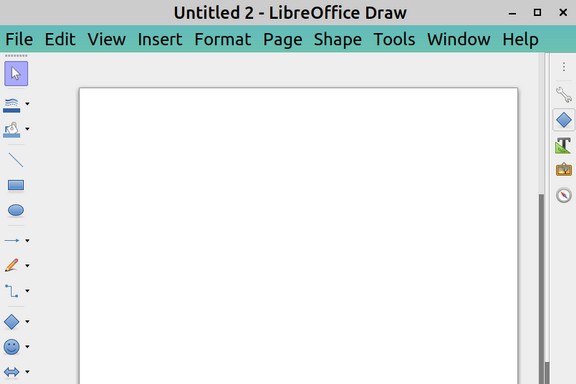
Libre Draw is a function that is completely missing in MS Office. While we can make simple diagrams just using the drawing functions of Libre Writer, using Libre Draw gives us much more flexibility. We can create a Libre Draw document for every one of our complex diagrams and then use ouor screen capture tool called Shutter to create an image of our diagram. Then copy the image to our Libre Writer document. Then if we need to modify the diagram, we can go back into the Libre Draw original document, make the needed changes and copy another image into our Libre Writer document. The Libre Draw diagrams can also be created using a different page background from our Libre Writer document helping to set off our diagrams from the rest of the text. To open a new Libre Draw document, click File, New, Drawing. The document will look something like a Libre Writer document.
Drawing shapes are shown to the left of the document and the styles panel is shown to the right. Either side can be hidden.
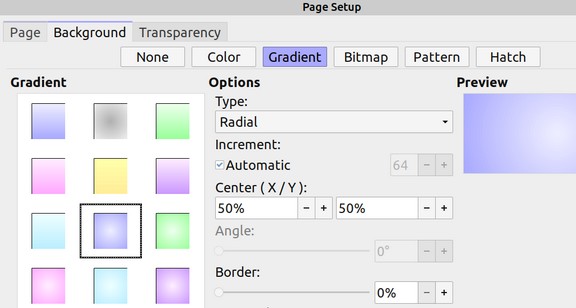
Click File Save As and give the diagram a name like My First Diagram. We will first choose a background color for the entire page by going to Page > Properties. Then click on the Background tab and click on the Gradient tab. Then pick a linear or radial gradient color then click OK.
Also in Page > Properties, Page tab, change the Page Layout from Portrait to Landscape as we nearly always want our diagrams to be wider than they are tall.
Add a Title Box
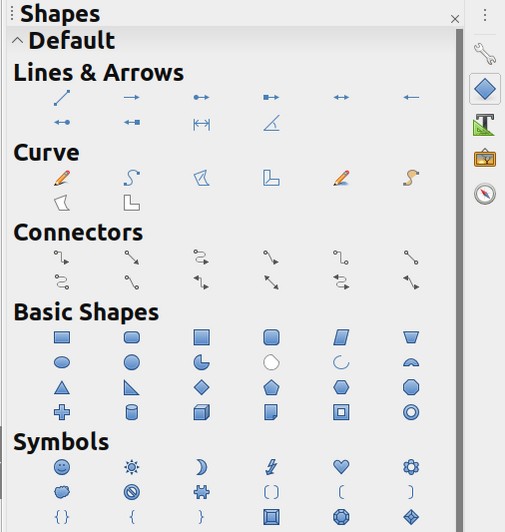
We will next give the diagram a title in a rounded box. In the Styles panel on the right, expand the Shapes panel to expose all of the Shape options:
Click the rounded box. Then click on the workspace and hold down your cursor and slide it across and down the screen to create the rounded box.
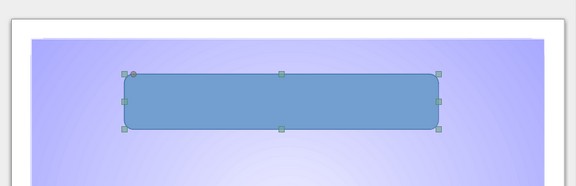
Click in the box and type, My First Diagram.
Select the title box to give it a different background color using the Area option in the right menu to bring up the custom colors screen or the Fill Color icon in the left panel to bring up the same screen.
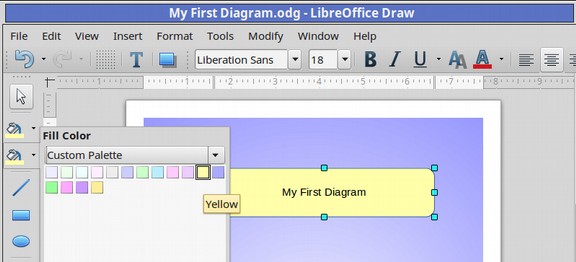
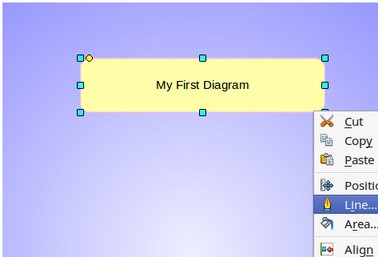
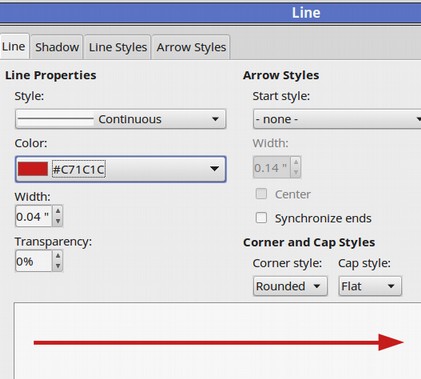
Then select line color just above the fill color and give the Title Box border a darker color. To set the width of the border requires a right click after selecting the title box and clicking on the Line option.
Then increase the Line Thickness.
Three Ways to Create a Flow Chart with Libre Draw
There are at least three ways to create a flow chart with Libre Draw:
#1 Use the Libre Draw Flow Chart Tool
#2 Use Colored Text Boxes with Block Arrows
#3 Use a Gallery Diagram and Clear Text Boxes.
Let’s briefly review each of these methods.
#1 Use the Libre Draw Flow Chart Tool
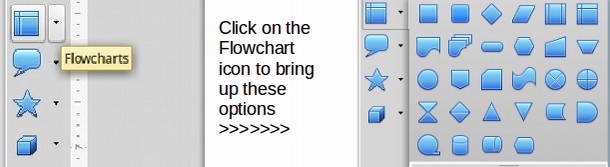
Click Save As and call our new drawing, Flow Chart Tool Diagram. There are three basic parts to a Libre Draw Flow Chart. First, we need to copy and paste some Flow Chart Icons into our Draw document. In the left side menu near the bottom, look for an icon that looks like a table.
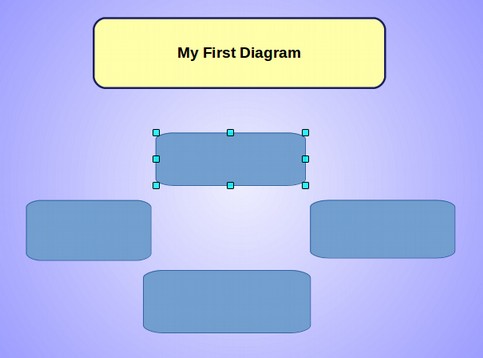
These are special shapes that come with Glue Points that we will eventually connect with “Connectors.” You can copy a shape by selecting it, right click, click Copy, then click Paste or drag it if you would prefer to do that). First, create four shapes on the canvas. Each shape will come with 8 predefined glue points which you can see by clicking on the shape.
We next need to pick out our Connectors lines.
The Connector icon is the bent line two icons above the happy face in the left column. Click on the drop down arrow and you will see 12 connector choices.
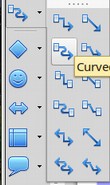
There are four connectors with one arrow at the end, four with no arrows at the end and four with two arrows – one at each end. Each of these three arrow choices comes in four options:
#1 90 degree bends.
#2 Straight line with no bends.
#3 Single Curve (highlighted above).
#4 Two curved bends.
We will use the line with one arrow that has a single curve (highlighted above). We will use this line to connect the middle glue points to form a circle. We have selected each line as we inserted it and made it red and wider so you can see them better:
Here is what our diagram looks like after adding all four connector lines:
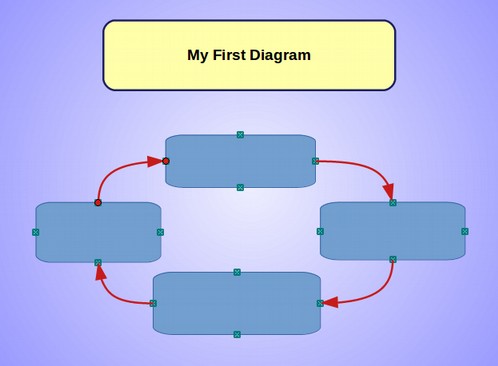
We can now right click on the boxes, change the background colors and add our text:

This method has a lot of options. Once you create one diagram, you can re-use it as a pattern for other diagrams.
#2 Use Colored Text Boxes with Block Arrows
This method is probably the easiest and fastest method. Open our first diagram and save it as My First Text Block Arrow Diagram. The Block Arrows are just below the Smiling Face icon in the left column.
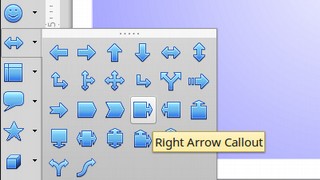
We will begin with a Right Arrow Callout. Then a down arrow, a left arrow and an Up arrow.

We could have also used normal rectangular text boxes with detached block arrows between them. Now add the background colors and text.

Here is what our diagram would look like if we used boxes and detached block arrows (which can be rotated at any angle).

#3 Create a Diagram with the Gallery Shapes
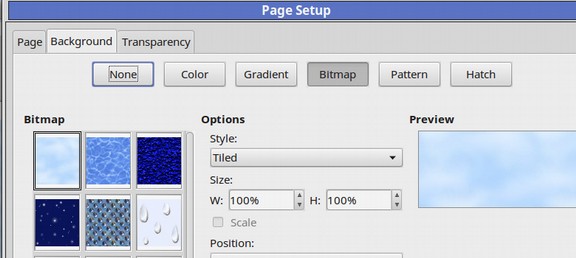
Save our Draw document as My third diagram with Gallery Shapes. Then go to Format Page Properties and change the Page Format to Landscape. Then click on Page Background and change it to Bitmap, Blue Cloud.
Now open the Gallery in the right column and click on Cycle 5. Then paste it into Libre Draw. Then add a clear Text box.
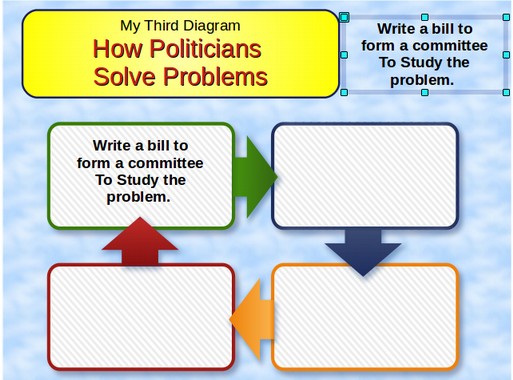
The key is to create your text boxes outside of the Gallery diagram. Then copy and paste them into the diagram. Here is what the finished product looks like.

Replace Text Boxes with Images or Simple Tables
One limitation of our image extraction tool, PicExtract which we will review later is that it will not extract images from any document that has even a single text box in it. Therefore, we should replace text boxes with images or simple tables. Here is an example of a text box that has been replaced with an image after the text box was created.

Here is a Single Row Table taking the place of a Text Box:
|
This may look like a Text Box. |
What’s Next?
In the next section, we will look at how to create a chart using Libre Calc.