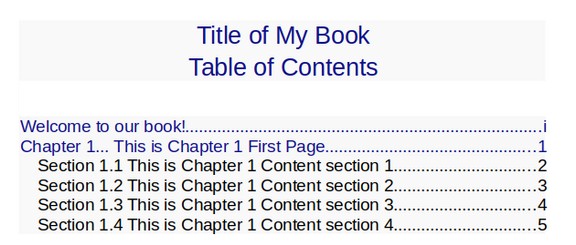
In the last section, we added a Table of Contents to our custom book template. In this section, we will improve the appearance of our Table of Contents by modifying the paragraph styles it uses.
Step 1: Improve the Appearance of the Table of Contents Title
To see what paragraph styles each line uses, just open the Styles panel and select the text:
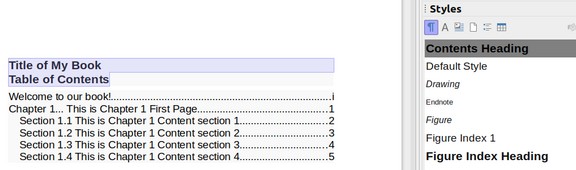
The title of the table of contents uses the Contents Heading paragraph style. Right click on the Contents Heading paragraph style and click modify. If you prefer to use the Context popup, you can also select the text. Then right click and click Paragraph, Edit Style. Either way will open up the following screen:
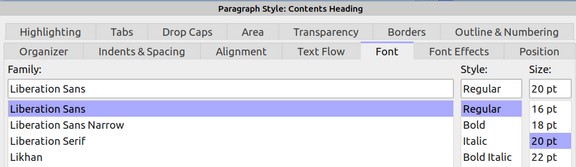
Change the Font to Regular 20 pt and the font color to dark blue.
Also change the alignment to Center and change the spacing to 0.16 inches above and 0.36 inches below. Then click OK.
Step 2: Improve the Appearance of the Chapter Titles
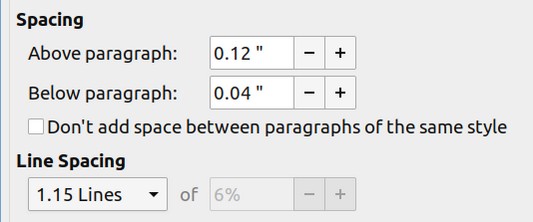
The chapter titles and the preface use the Content 1 paragraph style. Click Modify or Edit style to open up the Content 1 paragraph style screen. On the Spacing tab, change the spacing to 0.12 above the paragraph and 0.04 below the paragraph:
Then click on the Font Effects tab and change it to dark blue. Then click OK.
Step 3: Improve the Appearance of the Section Titles
The section titles use the Content 2 paragraph style. Click Modify or Edit to bring up this screen:
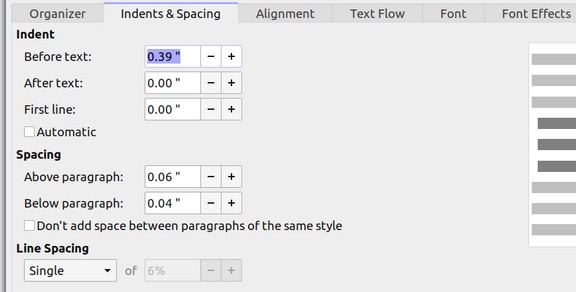
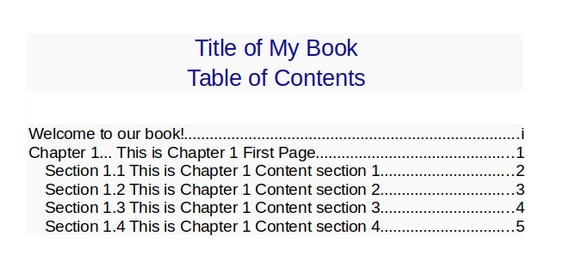
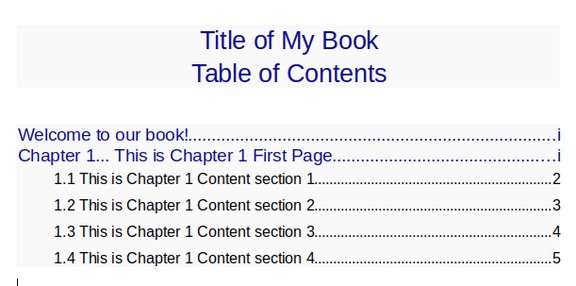
Increase the Before text spacing from 0.20 inches to 0.39 inches. Also increase the Spacing above the paragraph to 0.06 and the spacing below the paragraph to 0.04. Then reduce the font size from 14 to 12 and click OK. Here is what our custom Table of Contents looks like with a white background:
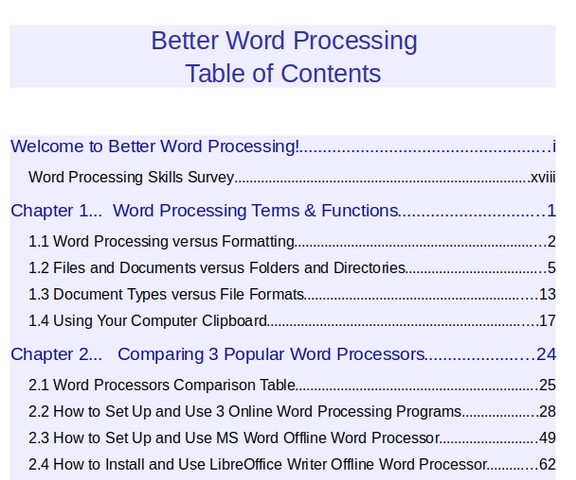
Here is what it looks like with more chapters and a light blue background:
Step 4: Improve the Appearance of our Footer text
Our footer uses the Footer paragraph style. By default, it has no spacing, is left aligned with a font that is 14 pt regular. Change the spacing to add 0.02 inches above and below the paragraph. Change the alignment to center. Change the font to 12 pt italic. Change the color to dark blue. Then click OK.

Step 5: Improve the Appearance of our Header Text
We have already added a light blue background and blue bottom border to our Header style. We will also add 0.02 spacing above and below and change the alignment to center and make the font size 14 bold italic with the font color dark blue:

Thus the name of your book will appear at the top of all chapter content pages and the name of each chapter and the page number will appear at the bottom of each chapter content page.
What’s Next?
This concludes our chapter on making a custom book template with Libre Office Writer. In the next chapter, we will look at how to create a custom book template with MS Word – despite the fact that MS Word does not have custom page styles.